Difference between revisions of "Agility for Android"
| Line 30: | Line 30: | ||
<div style="margin-left:0.75in;margin-right:0in;"></div> | <div style="margin-left:0.75in;margin-right:0in;"></div> | ||
| − | <div style="text-align:center;margin-left:0.5in;margin-right:0in;">[[Image:android home.png| | + | <div style="text-align:center;margin-left:0.5in;margin-right:0in;">[[Image:android home.png|200px|center]]</div> |
| Line 39: | Line 39: | ||
<div style="margin-left:0.75in;margin-right:0in;"></div> | <div style="margin-left:0.75in;margin-right:0in;"></div> | ||
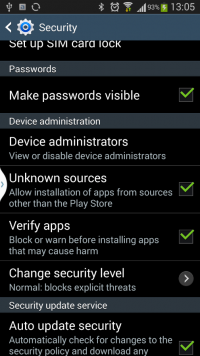
| − | <div style="text-align:center;margin-left:0.5in;margin-right:0in;">[[Image:android security.png| | + | <div style="text-align:center;margin-left:0.5in;margin-right:0in;">[[Image:android security.png|200px|center]]</div># In the Security menu, check Unknown Sources check-box: |
| Line 45: | Line 45: | ||
<div style="margin-left:0.75in;margin-right:0in;"></div> | <div style="margin-left:0.75in;margin-right:0in;"></div> | ||
| − | <div style="text-align:center;margin-left:0.5in;margin-right:0in;">[[Image:android settings.png| | + | <div style="text-align:center;margin-left:0.5in;margin-right:0in;">[[Image:android settings.png|200px|center]]</div> |
| Line 54: | Line 54: | ||
<div style="margin-left:0.75in;margin-right:0in;"></div> | <div style="margin-left:0.75in;margin-right:0in;"></div> | ||
| − | <div style="text-align:center;margin-left:0.5in;margin-right:0in;">[[Image:android attentionbox.png| | + | <div style="text-align:center;margin-left:0.5in;margin-right:0in;">[[Image:android attentionbox.png|200px|center]]{{anchor|Toc321490629}} </div> |
=== {{anchor|Toc323892487}} {{anchor|Toc390862452}} Download and Installation === | === {{anchor|Toc323892487}} {{anchor|Toc390862452}} Download and Installation === | ||
| Line 66: | Line 66: | ||
| − | <div style="text-align:center;margin-left:0.2957in;margin-right:0in;">[[Image:Android apkURL.png| | + | <div style="text-align:center;margin-left:0.2957in;margin-right:0in;">[[Image:Android apkURL.png|200px|center]]</div> |
| Line 88: | Line 88: | ||
| − | <div style="text-align:center;margin-left:0.5in;margin-right:0in;">[[Image:Android loginscreen.png| | + | <div style="text-align:center;margin-left:0.5in;margin-right:0in;">[[Image:Android loginscreen.png|200px|center]]</div> |
| Line 95: | Line 95: | ||
| − | <div style="text-align:center;margin-left:0.5in;margin-right:0in;">[[Image:Android systemURL.png| | + | <div style="text-align:center;margin-left:0.5in;margin-right:0in;">[[Image:Android systemURL.png|200px|center]]</div># <div style="margin-left:0.311in;margin-right:0in;">You can additionally setup desired notification options</div> |
| − | <div style="text-align:center;margin-left:0.5in;margin-right:0in;">[[Image:Android configuration.png| | + | <div style="text-align:center;margin-left:0.5in;margin-right:0in;">[[Image:Android configuration.png|200px|center]]</div> |
| Line 149: | Line 149: | ||
| − | <div style="text-align:center;margin-left:0in;margin-right:0in;">[[Image:Android systemParameters.png| | + | <div style="text-align:center;margin-left:0in;margin-right:0in;">[[Image:Android systemParameters.png|200px|center]]</div> |
<div style="text-align:center;">'''Picture 1 System parameters example'''</div> | <div style="text-align:center;">'''Picture 1 System parameters example'''</div> | ||
| Line 165: | Line 165: | ||
<div style="margin-left:0.5in;margin-right:0in;"></div> | <div style="margin-left:0.5in;margin-right:0in;"></div> | ||
| − | <div style="margin-left:0in;margin-right:0in;">[[Image:Android warningDateParam.png| | + | <div style="margin-left:0in;margin-right:0in;">[[Image:Android warningDateParam.png|200px|center]]</div> |
| Line 174: | Line 174: | ||
<div style="margin-left:0.5in;margin-right:0in;"></div> | <div style="margin-left:0.5in;margin-right:0in;"></div> | ||
| − | <div style="margin-left:0in;margin-right:0in;">[[Image:Android AlarmDateParam.png| | + | <div style="margin-left:0in;margin-right:0in;">[[Image:Android AlarmDateParam.png|200px|center]]</div> |
| Line 186: | Line 186: | ||
| − | [[Image:Android clockDateParam.png| | + | [[Image:Android clockDateParam.png|200px|center]] |
This parameter is used to control calculation of remaining time. In other words button in Agility for Android displays: '''''NOW – ClockDate'' '''where NOW denotes current date and time. | This parameter is used to control calculation of remaining time. In other words button in Agility for Android displays: '''''NOW – ClockDate'' '''where NOW denotes current date and time. | ||
| − | <div style="text-align:center;">[[Image:Android detailScreen.png| | + | <div style="text-align:center;">[[Image:Android detailScreen.png|200px|center]]</div> |
| Line 200: | Line 200: | ||
| − | <div style="margin-left:0in;margin-right:0in;">[[Image:Android descriptionParam.png| | + | <div style="margin-left:0in;margin-right:0in;">[[Image:Android descriptionParam.png|200px|center]]</div> |
This parameter is used to define the information displayed when new job arrives to the device: | This parameter is used to define the information displayed when new job arrives to the device: | ||
| − | <div style="margin-left:0.4925in;margin-right:0in;">[[Image:Android statusChange.png| | + | <div style="margin-left:0.4925in;margin-right:0in;">[[Image:Android statusChange.png|200px|center]]</div> |
| Line 216: | Line 216: | ||
<div style="margin-left:0in;margin-right:0in;">This parameter is used to define the information displayed when job details are requested on mobile device. The syntax of the parameter must be according to the StringExpression syntax. Result of the string expression should for a valid HTML, which will be used to diplay job details on the mobile device:</div> | <div style="margin-left:0in;margin-right:0in;">This parameter is used to define the information displayed when job details are requested on mobile device. The syntax of the parameter must be according to the StringExpression syntax. Result of the string expression should for a valid HTML, which will be used to diplay job details on the mobile device:</div> | ||
| − | <div style="margin-left:0.4925in;margin-right:0in;">[[Image:Android detailScreen.png| | + | <div style="margin-left:0.4925in;margin-right:0in;">[[Image:Android detailScreen.png|200px|center]]</div> |
| Line 228: | Line 228: | ||
| − | <div style="margin-left:0.5in;margin-right:0in;">[[Image:Android attachedPhoto.png| | + | <div style="margin-left:0.5in;margin-right:0in;">[[Image:Android attachedPhoto.png|200px|center]]</div> |
| Line 240: | Line 240: | ||
| − | <div style="margin-left:0.5in;margin-right:0in;">[[Image:Android jobNotification.png| | + | <div style="margin-left:0.5in;margin-right:0in;">[[Image:Android jobNotification.png|200px|center]]</div> |
| Line 272: | Line 272: | ||
| − | [[Image:Android labourDetails.png| | + | [[Image:Android labourDetails.png|200px|center]] |
=== {{anchor|Toc376953422}} {{anchor|Toc390862458}} Update Parameters === | === {{anchor|Toc376953422}} {{anchor|Toc390862458}} Update Parameters === | ||
| − | # If export-import definitions need to be updated on the mobile device, “Update Mobile Parameters” button can be used to force definitions sending. [[Image:Android updateParameters.png| | + | # If export-import definitions need to be updated on the mobile device, “Update Mobile Parameters” button can be used to force definitions sending. [[Image:Android updateParameters.png|200px|center]] |
= {{anchor|Toc390862459}} Using Agility for Android = | = {{anchor|Toc390862459}} Using Agility for Android = | ||
| Line 283: | Line 283: | ||
Agility for Android is represented in a set of installed applications by the icon: | Agility for Android is represented in a set of installed applications by the icon: | ||
| − | <div style="text-align:center;">[[Image:Android aLiteIcon.png| | + | <div style="text-align:center;">[[Image:Android aLiteIcon.png|200px|center]]</div> |
Once the icon is tapped, Agility for Android login screen will be presented. | Once the icon is tapped, Agility for Android login screen will be presented. | ||
| Line 291: | Line 291: | ||
The screen below shows the layout of the Agility for Android login screen. Top text field is provided to enter Agility login name, the text field below should contain user’s password. Remember me option has been provided to allow storing user credentials to be prepopulated when the user logs into the application next time: | The screen below shows the layout of the Agility for Android login screen. Top text field is provided to enter Agility login name, the text field below should contain user’s password. Remember me option has been provided to allow storing user credentials to be prepopulated when the user logs into the application next time: | ||
| − | [[Image:Android loginscreen.png| | + | [[Image:Android loginscreen.png|200px|center]] |
== {{anchor|Toc390862461}} Jobs List == | == {{anchor|Toc390862461}} Jobs List == | ||
| Line 297: | Line 297: | ||
After successful login, Jobs list screen is presented to the user: | After successful login, Jobs list screen is presented to the user: | ||
| − | [[Image:Android jobListScreen.png| | + | [[Image:Android jobListScreen.png|200px|center]] |
The icon on the left hand side of the job description, identifies current job status. It may be one of the following: | The icon on the left hand side of the job description, identifies current job status. It may be one of the following: | ||
| − | [[Image:| | + | [[Image:|50px|left]]- New job has arrived and it has not been accepted yet |
| − | [[Image:Android accept.png| | + | [[Image:Android accept.png|50px|left]] - Job has been accepted by the mobile device user |
| − | [[Image:Android suspend.png| | + | [[Image:Android suspend.png|50px|left]]- -Job has been suspended |
| − | [[Image:Android depart.png| | + | [[Image:Android depart.png|50px|left]]- Mobile device user has departed to do the job |
| − | [[Image:Android arrived.png| | + | [[Image:Android arrived.png|50px|left]]- Mobile device user has arrived on site to do the job |
| − | [[Image:Android completed.png| | + | [[Image:Android completed.png|50px|left]] - Job has been completed |
On the right of the icon, there is a job description which includes full job classification and additional information entered when the job was created. | On the right of the icon, there is a job description which includes full job classification and additional information entered when the job was created. | ||
| Line 321: | Line 321: | ||
Form menu is located on the top-right corner of the form. Once the form menu icon is tapped, following options are displayed: | Form menu is located on the top-right corner of the form. Once the form menu icon is tapped, following options are displayed: | ||
| − | [[Image:Android formMenu.png| | + | [[Image:Android formMenu.png|200px|center]]* Messages – directs to Messages forms, where message can be sent to Agility back office system, which are available for review using Labour resources -> Expert Messages form: |
| − | [[Image:Android expertMessages.png| | + | [[Image:Android expertMessages.png|200px|center]]* Sort – allows to sort jobs list by start date, due date or select default sorting which can be configured by the Agility back office system |
* New Job – directs the system to the “New Job” form, which has been provided to support raising new AGV requests. The form is described in the next paragraph. | * New Job – directs the system to the “New Job” form, which has been provided to support raising new AGV requests. The form is described in the next paragraph. | ||
| Line 336: | Line 336: | ||
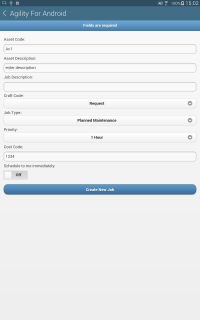
<div style="margin-left:0.25in;margin-right:0in;">New AGV request can be raised using “New Job” menu entry as described in the point above. The form layout is as shown on the screenshot below:</div> | <div style="margin-left:0.25in;margin-right:0in;">New AGV request can be raised using “New Job” menu entry as described in the point above. The form layout is as shown on the screenshot below:</div> | ||
| − | [[Image:Android newJobScreen.png| | + | [[Image:Android newJobScreen.png|200px|center]] |
Rules for data population are exactly as described for Agility system, described in '''''AGV Request Release Notes''''' document. | Rules for data population are exactly as described for Agility system, described in '''''AGV Request Release Notes''''' document. | ||
| Line 346: | Line 346: | ||
This form is displayed when particular job is tapped on the job list screen. | This form is displayed when particular job is tapped on the job list screen. | ||
| − | [[Image:Android detailScreen.png| | + | [[Image:Android detailScreen.png|200px|center]] |
The screen is divided in to sections, where related information is displayed:* Code – Job Code | The screen is divided in to sections, where related information is displayed:* Code – Job Code | ||
| Line 364: | Line 364: | ||
Job status updates are performed on the details screen and are accessible using device’s menu button. After the button is pressed, the option to move the job to the next status will be displayed: | Job status updates are performed on the details screen and are accessible using device’s menu button. After the button is pressed, the option to move the job to the next status will be displayed: | ||
| − | [[Image:Android statusChange.png| | + | [[Image:Android statusChange.png|200px|center]] |
Only statuses, which are available to be accessed from the current status will be shown in the menu options displayed. In the example above, the job is currently suspended, so there are 2 statuses available – '''''Departed''''' or '''''Arrived''''' | Only statuses, which are available to be accessed from the current status will be shown in the menu options displayed. In the example above, the job is currently suspended, so there are 2 statuses available – '''''Departed''''' or '''''Arrived''''' | ||
| Line 405: | Line 405: | ||
<div style="margin-left:0.25in;margin-right:0in;">Next step is take photo by camera. If you want save your image, you should click button “Save”, if not - click “Discard” button.</div> | <div style="margin-left:0.25in;margin-right:0in;">Next step is take photo by camera. If you want save your image, you should click button “Save”, if not - click “Discard” button.</div> | ||
| − | <div style="text-align:center;">[[Image:Android takePhoto.png| | + | <div style="text-align:center;">[[Image:Android takePhoto.png|200px|center]] [[Image:Android savePhoto.png|200px|center]]</div> |
<div style="margin-left:0.25in;margin-right:0in;">If any photos are saved against the job, additional information icon is displayed on the job list form. </div> | <div style="margin-left:0.25in;margin-right:0in;">If any photos are saved against the job, additional information icon is displayed on the job list form. </div> | ||
| − | <div style="text-align:center;">[[Image:Android attachedPhoto.png| | + | <div style="text-align:center;">[[Image:Android attachedPhoto.png|200px|center]]</div> |
Once the job is completed, all photos done against the job will be transferred to back office and linked as job attachments. | Once the job is completed, all photos done against the job will be transferred to back office and linked as job attachments. | ||
| Line 449: | Line 449: | ||
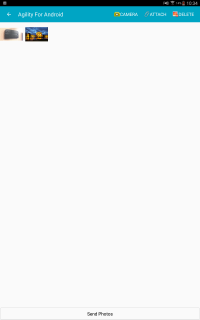
| − | <div style="text-align:center;">[[Image:Android attachDialog.png| | + | <div style="text-align:center;">[[Image:Android attachDialog.png|200px|center]] [[Image:Android gallery.png|200px|center]]</div># If you attach photo you will see information about it. |
| Line 458: | Line 458: | ||
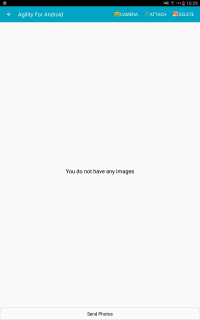
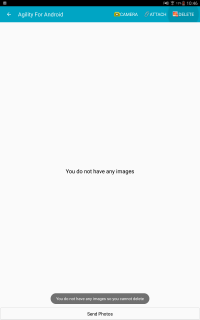
| − | <div style="text-align:center;">[[Image:| | + | <div style="text-align:center;">[[Image:|200px|center]]</div># If you do not have any image you see information about it. If you want click icon delete images and you do not have images you will see information about it. |
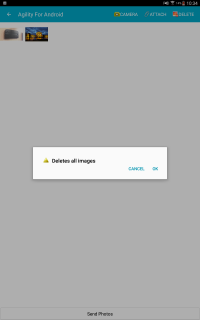
| − | <div style="text-align:center;">[[Image:Android gallery1.png| | + | <div style="text-align:center;">[[Image:Android gallery1.png|200px|center]] [[Image:Android gallery2.png|200px|center]]</div># Gallery form have functionality: [[#CreatePhoto|take a photo]], [[#AttachPhoto|attach a photo]] and delete photos |
| − | <div style="text-align:center;">[[Image:Android gallery3.png| | + | <div style="text-align:center;">[[Image:Android gallery3.png|200px|center]] [[Image:Android gallery4.png|200px|center]]</div># If your images will be deleted you will see information on white screen. |
| − | <div style="text-align:center;">[[Image:Android gallery1.png| | + | <div style="text-align:center;">[[Image:Android gallery1.png|200px|center]]</div> |
| Line 479: | Line 479: | ||
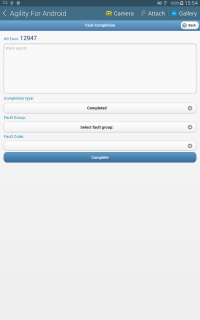
Job completion screen appears on the device once the status Completed is selected on the menu on the detail form. Once this option is selected, screen like on the right hand side below will be shown: | Job completion screen appears on the device once the status Completed is selected on the menu on the detail form. Once this option is selected, screen like on the right hand side below will be shown: | ||
| − | [[Image:| | + | [[Image:Android completionScreen.png|200px|center]]* Completion code: drop-down allowing to select appropriate completion code (fault code) for the job |
* Response Failure Reason: when the job is overdue in relation to response KPI, this field will be presented to the user to specify the reason of KPI failure. | * Response Failure Reason: when the job is overdue in relation to response KPI, this field will be presented to the user to specify the reason of KPI failure. | ||
* Rectification Failure Reason: when the job is overdue in relation to rectification KPI, this field will be presented to the user to specify the reason of KPI failure. | * Rectification Failure Reason: when the job is overdue in relation to rectification KPI, this field will be presented to the user to specify the reason of KPI failure. | ||
Revision as of 08:18, 12 April 2016
Contents
Installing Agility for Android
Prerequisites and Installation
Android device requirements
- Supported android versions: 4.2 and above. Agility for Android works on much wider range of android versions, but at the moment supported are only versions mentioned above.
- Minimum screen resolution is HVGA (320x480 pixels), recommended resolution is WVGA (480x800 pixels)
- Minimum: 128MB RAM memory and 20MB of free storage.
- Agility for Android will work with any IP network connection (regardless of Physical Layer: GPRS, 3G, WIFI).
Preparing Android device
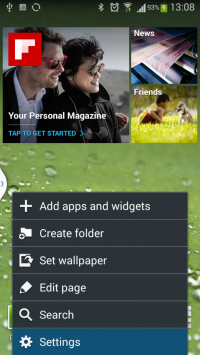
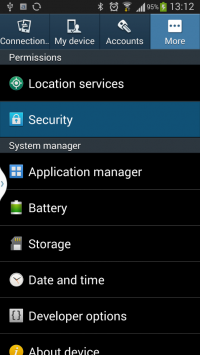
- In the settings menu Tabs select “More…” and select “Security
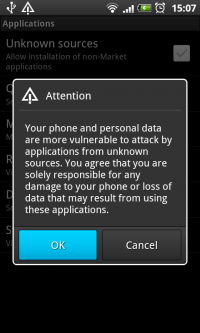
- In the message box, select OK.
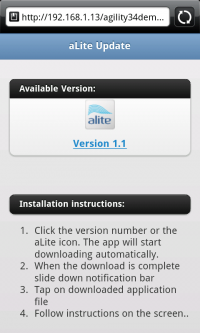
Download and Installation
- Click the version number or the aLite icon. The app will start downloading automatically.
- When the download is complete slide down notification bar.
- Tap on downloaded application file.
- Follow instructions on the screen.
Configuration
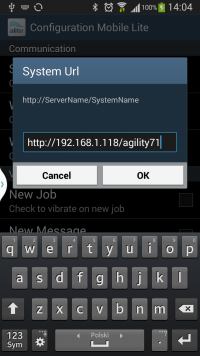
- Run aLite application, press menu button and press Configuration button.
- From configuration options select System Url. In text box type appropriate URL to agility system
- Back to login screen, and you can login into system with provided credentials.
Agility Configuration
Agility configuration file
<GeneralWebService
enabled="true"
.
.
.
/>
System parameters controlling Agility for Android
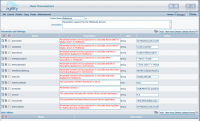
To enable Agility for Android functionality in Agility appropriate system parameter must be set. Go to System Configuration -> System Parameters. Open MobileLite folder and set MobileLiteMode value to true.
Other parameters allows customization of data presented on android from agility. System parameters allow also to control global upgrade of Agility for Android application on android devices (please refer Licensing And Software Update document for details).
System parameters for Agility for Android description:
- WarningDate
This parameter is used to turn countdown clock into warning state. Countdown timer color will turn orange if current time reach WarningDate.* Alarm date
This parameter is used to turn countdown into alarm state. Countdown timer color will turn red if current time reach AlarmDate.
- Clock date
This parameter is used to control calculation of remaining time. In other words button in Agility for Android displays: NOW – ClockDate where NOW denotes current date and time.
- Description
This parameter is used to define the information displayed when new job arrives to the device:
- HtmlDescription
- HtmlListDetails
- MobileLiteMode
- SortOrder
Set up labour for use with Agility for Android
The labour resource using Agility for Android software on the mobile device has to be configured as Mobile Lite user. Additionally, labour has to be paired with agility user profile. Once this is done, user should be able to login from mobile device (using agility user credentials).
Update Parameters
- If export-import definitions need to be updated on the mobile device, “Update Mobile Parameters” button can be used to force definitions sending.
Using Agility for Android
Agility for Android is represented in a set of installed applications by the icon:
Once the icon is tapped, Agility for Android login screen will be presented.
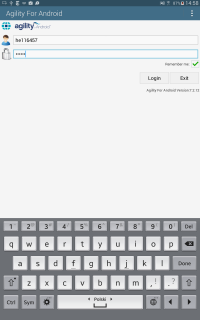
Login screen
The screen below shows the layout of the Agility for Android login screen. Top text field is provided to enter Agility login name, the text field below should contain user’s password. Remember me option has been provided to allow storing user credentials to be prepopulated when the user logs into the application next time:
Jobs List
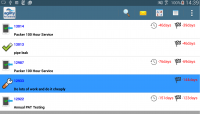
After successful login, Jobs list screen is presented to the user:
The icon on the left hand side of the job description, identifies current job status. It may be one of the following:
[[Image:|50px|left]]- New job has arrived and it has not been accepted yet
- Job has been accepted by the mobile device user - -Job has been suspended - Mobile device user has departed to do the job - Mobile device user has arrived on site to do the job - Job has been completedOn the right of the icon, there is a job description which includes full job classification and additional information entered when the job was created.
On the top right corner, the figure is displayed representing time remaining until the job becomes overdue.
Tapping the description of the particular job will cause a detail screen for that job to be displayed. The layout and functionality of the details form is described in Job details section.
Form menu is located on the top-right corner of the form. Once the form menu icon is tapped, following options are displayed:
* Messages – directs to Messages forms, where message can be sent to Agility back office system, which are available for review using Labour resources -> Expert Messages form:
- New Job – directs the system to the “New Job” form, which has been provided to support raising new AGV requests. The form is described in the next paragraph.
New Job (AGV Request)
Rules for data population are exactly as described for Agility system, described in AGV Request Release Notes document.
Once Submit Request button is tapped, new AGV request is created as shown on the right hand side screenshot above. Add New button can be used to create another AGV request. Using Back button on the device, the form might be closed to go back to Job List form.
Job details
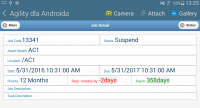
This form is displayed when particular job is tapped on the job list screen.
The screen is divided in to sections, where related information is displayed:* Code – Job Code
- Due In/Overdue by – depending on the condition of the job being overdue or not, it displays the time remaining until the job becomes overdue or the time by which the job is already overdue.
- Status – current status of the job
- Location – placed below status information it summarises information about Dept/Ward, Room Number and the Asset against which the job has been raised.
- Section with key date information (Start/Latest Start/Due)
- Priority information
- Additional comments about the job
- Specific information regarding the task within the job
- Contact details of the person responsible for the job
Job Status updates
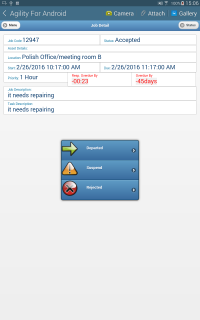
Job status updates are performed on the details screen and are accessible using device’s menu button. After the button is pressed, the option to move the job to the next status will be displayed:
Only statuses, which are available to be accessed from the current status will be shown in the menu options displayed. In the example above, the job is currently suspended, so there are 2 statuses available – Departed or Arrived
The last status in the flow is Completed status, which causes Job completion form to be displayed. Details of the form completion are described in the Job Completion section
Create/Attach Photo - Gallery
Create Photo
Once the job is completed, all photos done against the job will be transferred to back office and linked as job attachments.
Attach Photo
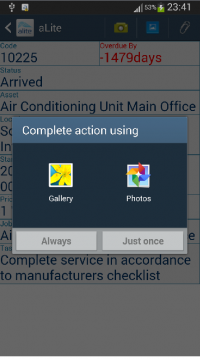
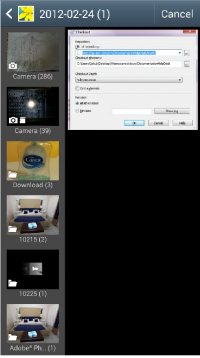
- If you want attach photo for current job you should click icon “Attach” on form.
Gallery
- If you want see gallery for current job you should click icon “Gallery” on form
Job Completion
Separate form has been provided to gather all the information required during job completion process. Related information has been grouped in sections so the screen design is clearer for the user. Each section is separately explained below.
Job completion screen appears on the device once the status Completed is selected on the menu on the detail form. Once this option is selected, screen like on the right hand side below will be shown:
* Completion code: drop-down allowing to select appropriate completion code (fault code) for the job- Response Failure Reason: when the job is overdue in relation to response KPI, this field will be presented to the user to specify the reason of KPI failure.
- Rectification Failure Reason: when the job is overdue in relation to rectification KPI, this field will be presented to the user to specify the reason of KPI failure.
- Additional information: depending on the job type and other factors, various additional attributes will be presented to be populated together with the job completion. The rules of the attributes set displayed are exactly the same as the rules used in the standard Agility job completion screen.
