Difference between revisions of "Scheduling"
(→Daily Scheduler) |
(→Schedules tab) |
||
| Line 309: | Line 309: | ||
====Schedules tab ==== | ====Schedules tab ==== | ||
Schedules tab filters range of schedules shown on schedules pane. Start date and end date also defines how many rows of days are shown on schedules pane. | Schedules tab filters range of schedules shown on schedules pane. Start date and end date also defines how many rows of days are shown on schedules pane. | ||
| − | + | If "Show completed schedules" is unchecked then there will be no any completed jobs displayed in the schedules pane. | |
| − | [[File: | + | [[File:multischedulerschedoptions.png|400px]] |
=== Jobs pane === | === Jobs pane === | ||
Revision as of 15:11, 18 January 2017
Contents
Scheduling
The scheduler provides graphical representation of the current Work Orders which are both scheduled and unallocated, allowing work to be scheduled and allocated to Labour Resources, without the requirement to assign a labour resource to each individual work order. It also provides a visual planner to allow workload to be organised.
Work is allocated and scheduled by individual tasks within a work order, rather than scheduling the Work Order as a single unit. This allows tasks within a work order to be scheduled to different Labour Resources.
There are currently three scheduler formats in the default system.
Daily Scheduler
Scheduling > Daily scheduler
The daily scheduler is effectively a work planner.
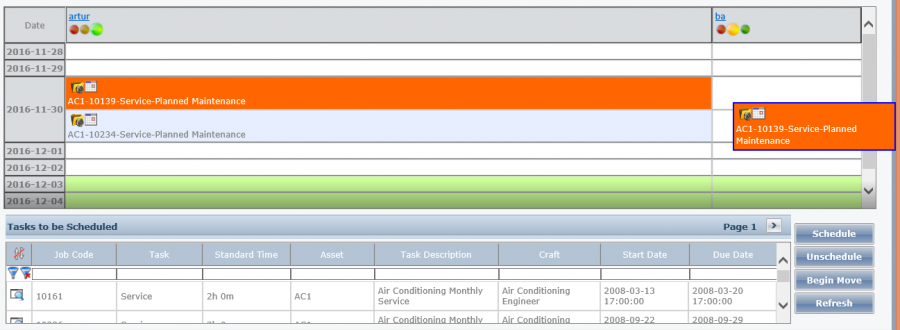
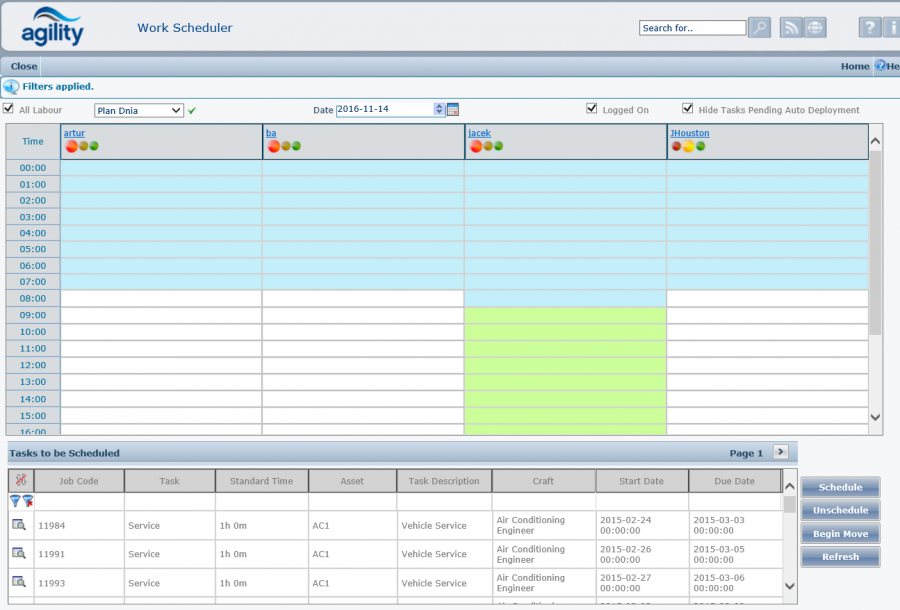
The screen is split into two panes. The top half shows the planner grid with filter options. Each column repo represents a labour resource, showing the available working hours based upon the shift pattern. Each row represents a day. The dates shown will depend up the start/end date range selected.
The lower pane displays a grid containing a list of unscheduled tasks; these are tasks that have not yet been allocated to a labour resource. Since this grid shows tasks for work orders containing more than one task the same work order number will be repeated in the grid, but for each different task. The grid operates in the same way as a standard scan form in terms of column sort, drill down and column filters.
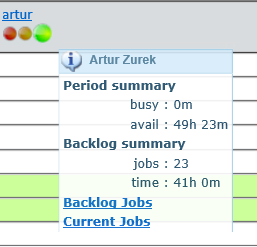
Within the scheduler grid, below each labour resource name is a ‘traffic light’. This indicates the availability of that labour resource.
When allocated work load for the specific labour resource is low, i.e. they still have a lot of time available based upon the available hours the indicator will show green. As the workload increases the indicator will turn to amber and then red.
Moving the mouse over the indicator will provide a tooltip summary of the current work load for the labour resource.
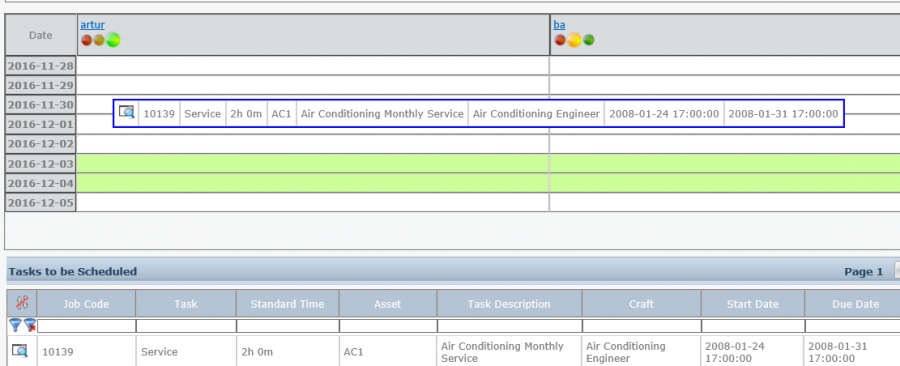
Scheduling a task is done using a drag and drop technique. The selected task is ‘grabbed’ from the tasks grid by selecting it by clicking on it and holding the left mouse button. Whilst continuing to hold the left mouse button the task is then dragged to the required slot on the scheduler grid and the left button is released which will drop the tasks onto the selected slot.
Select and grab task with left mouse. Drag task, continuing to hold left button to required slot. Mouse pointer changes to indicate that a task has been "grabbed".
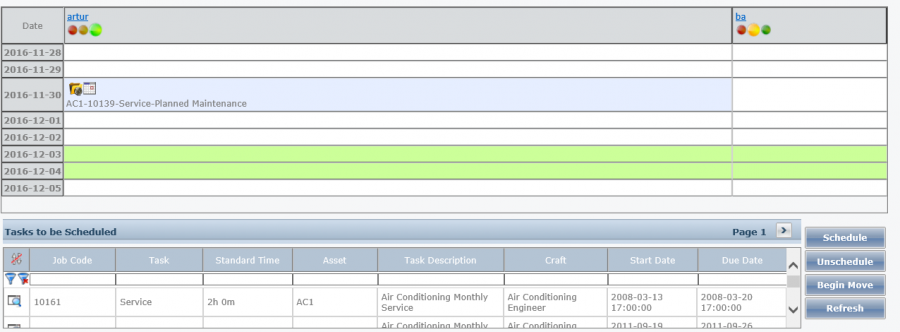
When the task has been allocated it will appear in the grid.
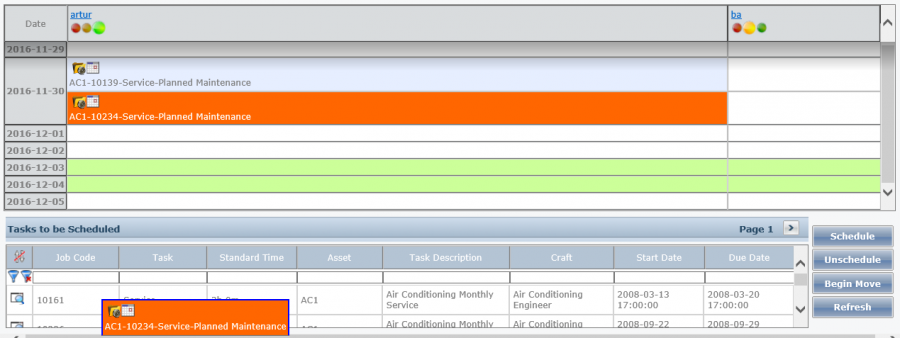
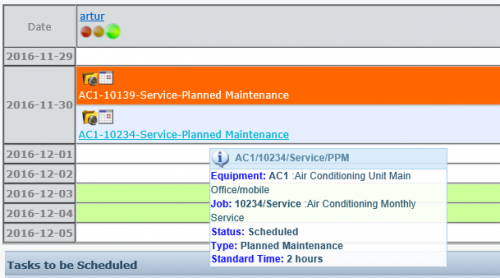
When additional tasks are added to the labour resource they will also appear in the grid. The text displayed is a hyperlink and clicking on this will take you straight to the task detail screen.
A task can be un-allocated from a labour resource by performing the reverse action of allocating.
The tasks is selected and grabbed from the scheduling grid, dragged and dropped back onto the tasks grid. This action will unallocated the task and allow the task to be allocated to a different labour resource.
Tasks can be unallocated by dragging them back onto the tasks grid.
Tasks can also be moved between labour resources within the scheduler grid using the same drag and drop technique. This action will unallocated the task from the previous labour resource and re-allocate it to the new selected labour resource.
Tasks can be re-allocated by dragging them between labour resources.
If the mouse is moved over an allocated task a summary of the task details is displayed as a tooltip.
Each displayed labour resource name is also hyperlinked and clicking on it will display the labour resource detail record.
During the scheduling process if an illogical action is performed the user will be prompted with a question. The question will indicate the nature of the issue and prompt for what action to take.
For example if you attempt to schedule a task where the due date of the job/task is before the date that you are attempt to schedule it for, a question will be generated.
At this point it is necessary to resolve the query before any further scheduling can take place. Clicking ok will continue with the attempted action. Clicking cancel will cancel the attempted action.
The scheduler also contains additional filters to assist with focussing the scheduler grid and un-allocated tasks grid on specific crafts or job types.
These are located at the top of the scheduler pane.
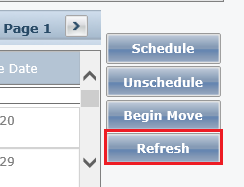
To select a craft and/or job type click on the appropriate drop down list and select. To apply the filter click the refresh button located at the bottom right of the screen.
The ‘Number of minutes before start date’ will filter out all tasks with a start date that does not fit within the selected number of minutes. In other words, only the tasks which are due to start within ‘Selected number of minutes’ from now will show in the list of tasks available for scheduling.
The default value for ‘Number of minutes before start date’ field is defined in system parameters under “ProcessMngt\Scheduler\NumberOfMinutesThreshold”
The filter can also be applied by clicking the refresh button on your browser.
Within the same filter tool bar is a start and end date range. These dates are automatically populated to reflect one week from current date. Each one can be changed to either reduce or increase the period shown in the Employee/Date covered grid towards the end of the screen display.
For more space utilisation, the daily scheduler can be configured to show a maximum number of completed tasks per labour resource per day. The maximum number of completed tasks can be defined in the following system parameter “ProcessMngt\Scheduler\CompletedTasksIncluded”
In this example, the maximum number of completed tasks is set to 2 in the system parameter, the scheduler will show the most recent 2 completed tasks per labour per day plus any outstanding tasks. When work order 10918 is completed, the scheduler updates to show work orders 10918 & 10753. Work order 10094 will disappear from the list.
Appointment Scheduler
Scheduling > Appointment Scheduler
This scheduler is operationally similar to the daily scheduler with the main difference being that this scheduler has an additional and secondary viewing mode. The mode is selected by the selection list schedule day/schedule labour.
In schedule day mode the view is much the same as the daily scheduler where each labour resource occupies a column and the planner grid looks at a single day with time slots on each row.
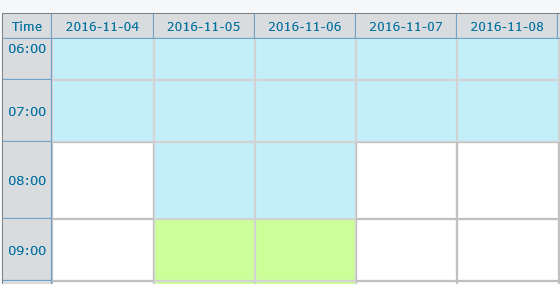
In labour mode the grid changes to focus on a single labour resource with each column representing a day within the selected date range and with time slots on each row.
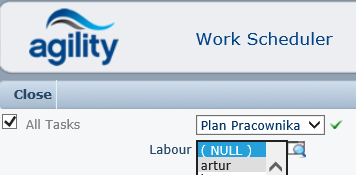
The required labour resource must be selected from the selection list located at the top of the planner grid. To change to a different labour resource simply select a different one from the list.
A period start and end date range must also be selected using the date selection boxes at the top of the grid.
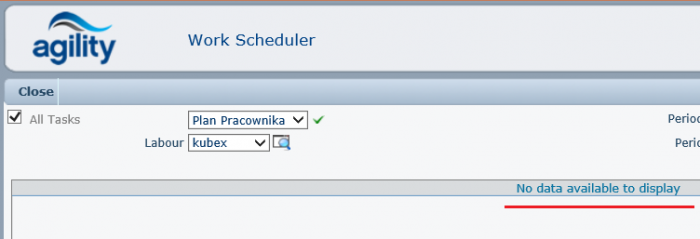
The labour resource and dates must be selected in order for the planner grid to be displayed, if and one of these items is not selected the grid will not display.
The operation of allocating and un-allocating tasks is exactly the same as the ‘Daily Scheduler’
Asset Based Scheduler
Scheduling > Asset Based Scheduler
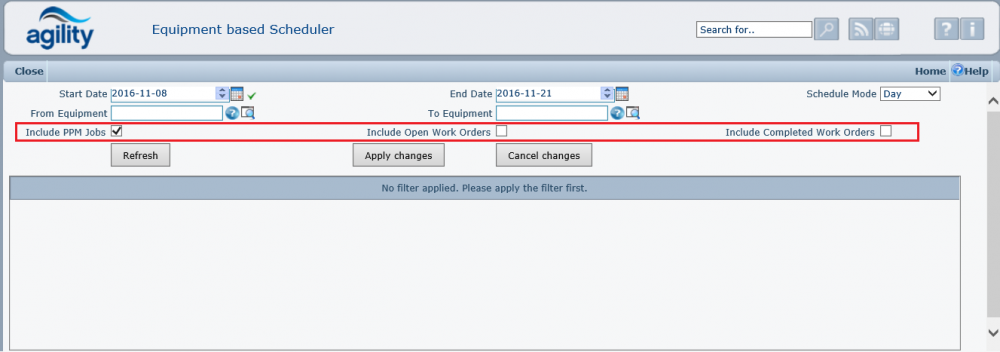
The asset based scheduler is a tool that is designed to assist with time management. It is designed to resemble a work planner report.
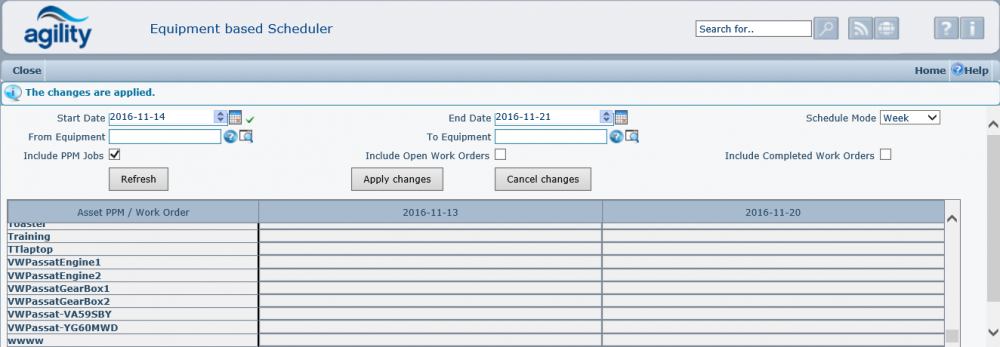
The grid displays equipment items down on each row and dates for each time interval. The time intervals can be selected by selected the ‘Schedule mode’ from the drop down list.
The grid will display;
- PPM Calendar Schedules
- PPM Runtime Schedules
- Open Work orders
- Completed Work orders.
Each of these elements can be show or hidden by using the checkboxes at the top of the grid.
There are additional filter options to select the period range or filter on a range of equipment items; these are also located at the top of the grid.
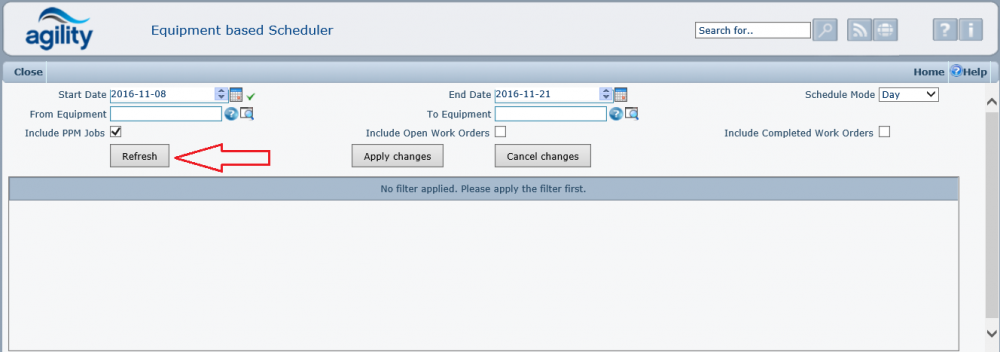
When applying a filter once the filter criteria have been set it is important to click the refresh button to refresh the grid.
Multi scheduler
Scheduling > Multi scheduler
The multi scheduler is effectively a work planner. It consists of 3 panes.
- Jobs for schedule pane
- Scheduled jobs pane
- Filter pane
Filter pane
Scheduling > Multi scheduler > Filter pane
Filter pane allows filtering of data presented on multi scheduler. It contains 3 tabs:
- Jobs tab
- Labours tab
- Schedules tab
Jobs tab
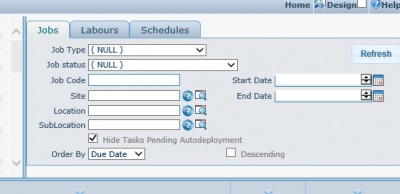
Jobs tab filters contents of jobs pane, list of jobs available for schedule.
Labour tab
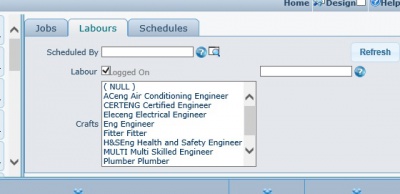
Labour tab filters which labour columns are presented on schedules pane.
Schedules tab
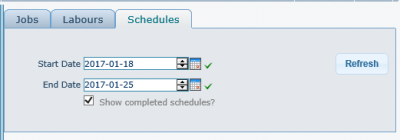
Schedules tab filters range of schedules shown on schedules pane. Start date and end date also defines how many rows of days are shown on schedules pane.
If "Show completed schedules" is unchecked then there will be no any completed jobs displayed in the schedules pane.
Jobs pane
Schedules pane
Usage
Scheduling is done by selecting one or more jobs from jobs list or schedules pane and dragging them to schedule slot. During scheduling process the form is disabled and the progress of operation is shown in lower right corner of form. If scheduling requires additional confirmation the corresponding message is shown allowing user selecting available answers. If multiple schedules require the same confirmation, user can check to auto answer all questions with the same selection. In case of error due to validation or other problems, the information is displayed as red message.
Unscheduling is done by selectin one or more jobs from schedule pane and dragging them to jobs pane.
Multi scheduler shows jobs scheduled for days before visible days as "backlog" row. All of them are put here. There is additional information displayed on each of such job using background color, the same as on "The Completion RAG Status". ultischeduler generates additional classes for jobs displayed OverdueCompletionTargetRowStyle, OKCompletionTargetRowStyle , ConcernCompletionTargetRowStyle for all jobs not only in backlog but also for job pane list. The actual colors are defined by following styles showing rag colors only in backlog row:
It is controlled by style sheet in NewGui.css
#scheduler1 div.jobs_dragger div.ui-selected {
	background-color: #79b7e7 !important;
}

#scheduler1 table.schedulesTable  div.ui-selected{
	background-color: #79b7e7 !important;
}

#scheduler1 .OverdueCompletionTargetRowStyle{
	background-color: rgba(207, 228, 244, 0.5) !important;
}
#scheduler1 .OKCompletionTargetRowStyle{
	background-color: rgba(207, 228, 244, 0.5) !important;
}
#scheduler1 .ConcernCompletionTargetRowStyle{
	background-color: rgba(207, 228, 244, 0.5) !important;
}

#scheduler1 td[data-time-id='backlog'] .OverdueCompletionTargetRowStyle{
    background-color: #FF4444 !important;
}
#scheduler1 td[data-time-id='backlog'] .OKCompletionTargetRowStyle{
	background-color: #11AA11 !important;
}
#scheduler1 td[data-time-id='backlog'] .ConcernCompletionTargetRowStyle{
	background-color: #FFCC00 !important;
}
Auto Scheduling / Auto Deployment
Agility can be configured for auto scheduling. Default installation has that functionality turned off.
Overview
Auto scheduling ( auto deployment ) generally is designed to work with employee which use Agility for Android or Mobile Expert. It is a process in Agility consisting of following parts:
- not all tasks are are auto scheduled, they have to be in status with auto schedule enabled and the task has to have auto schedule checked
- selecting best matching employee for the task
- scheduling employee to the task
- checking if employee accepted the task on its mobile
- if task is not accepted process retries determined number (MaxNumberOfFailedAutoDeployments) of times by unscheduling employee and restarting from the begin ( selects different employee )
Selecting employee
Most complicated function is selecting employee for scheduling. Auto deployment uses following rules:
- employee has to be logged on ( on Agility for Android or Mobile Expert)
- employee has to haven't any already scheduled not completed tasks which are marked as not interruptable (it is default)
- employee record contains information about number of accepted or rejected tasks. It is incremented after every such a action. If that number exceeds the system parameter ProcessMngt\Autodeployment\MaxCumulativeRejections
- if employee and asset zone scoring is used (ResourceSelectionMethod=ZONE), for each available employee system calculates distance from employee current location to task location, shorter is better
- number of interruptible task scheduled to employee is calculated , lowest number is better
- date of last task completion , later is better
Using that the best employee is selected. If there is no matching employee the auto deployment of the task is stopped and task status is changed to status ESCALATION ( defined is system parameters )
Configuration
To enable autodeployment following steps have to be done:
- Set system parameter ProcessMngt\Autodeployment\AutodeploymentInUse to true
- If there is no additional process which locates employees agility assumes static location of employee. System paraemter ProcessMngt\Autodeployment\FindEmployeesLastSeenDisabled has to be set to true. There are two solutions.
- System doesn't care of employee and task location. System parameter ProcessMngt\Autodeployment\ResourceSelectionMethod has to be set to "SIMPLE" which means no distance calculations.
- System has statically allocated employees to zones. In that case every employee has to have current location , which is asset which has or its parents set zone and the same must be for job asset. For that zones has to be defined zone distance. Functionally such a situation will allow statically assign employees to particular areas ( zones ). For example every site can be a zone, and employee can be assigned to site. So only employees from the same site will be allowed to be scheduled. System parameter ProcessMngt\Autodeployment\ResourceSelectionMethod has to be set to "ZONE" which means use distance calculations.
- Business processes of Auto Scheduling has to be additionally activated using menu option in system Parameters form Others\Auto Deployment\Enable.
- Default time for accept task is 1 minute. It could be modified by system parameter ProcessMngt\Autodeployment\TimeoutLabourAccept
- Status codes defined in configuration of autodeployemnt have to match status codes use in Agility and Agility for Android:
| Autodeployment configuration status | Description |
|---|---|
| ManualDeployStatus | Status used when autodeployment can not schedule job |
| ScheduledStatusCode | Status of initial schedule |
| ScheduleNotAcceptedStatusCode | It is additional status code which happens when Agility for Android receives task but user not yet accepted it |
| CompletedStatusCode | Complete status code |
| LabourAcceptedScheduleStatus | Labour accepted job |
| LabourRejectedScheduleStatus | Labour rejected job |


