Agility for Android
Contents
- 1 Installing Agility for Android
- 2 Using Agility for Android
- 2.1 Login screen
- 2.2 Processing the job
- 2.3 Jobs List
- 2.4 Job details
- 2.5 Job Status
- 2.6 Create/Attach Photo - Gallery
- 2.7 Checklist form
- 2.8 Job Completion
- 2.9 New Job
- 2.10 Follow-on Job
- 2.11 Issue/Return form
- 2.12 Help Desk Request form
- 2.13 Asset Enquiry
- 2.14 Offline/Online mode
- 2.15 Feedback form
- 2.16 Response Target
- 2.17 Route Sheets
- 2.18 Signatures
- 2.19 Search
- 2.20 Export versioning
- 2.21 Log Off
- 3 Customer specific functionalities
Installing Agility for Android
Prerequisites and Installation
Android device requirements
- Agility for Android is supported on Android versions 4.2 and above.
- Minimum screen resolution: HVGA (320x480 pixels), recommended resolution: WVGA (480x800 pixels)
- Minimum: 128MB RAM memory / 20MB of free storage.
- Agility for Android will work with any IP network connection (regardless of Physical Layer: GPRS, 3G, 4G, WIFI).
Preparing the Android device
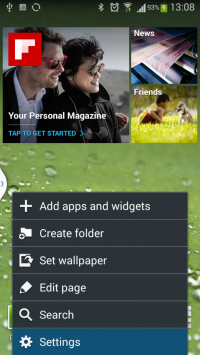
(Different Android devices have different ways of accessing the menu settings. Please refer to the device manual)
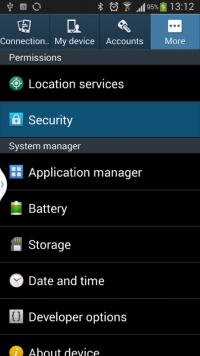
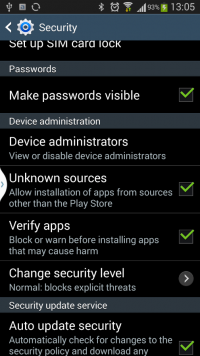
2. In the settings menu Tabs select “More…” and select “Security”
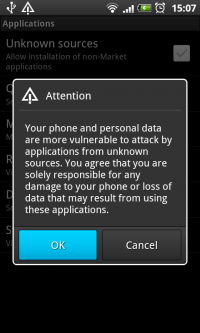
4. In the message box, select OK.
Download and Installation
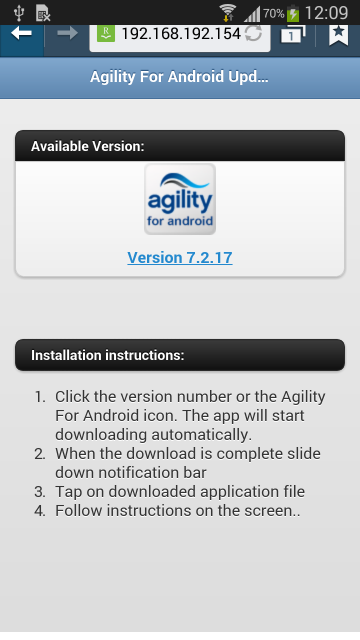
- Click the version number or the aLite icon. The app will start downloading automatically.
- When the download is complete slide down notification bar.
- Tap on downloaded application file.
- Follow instructions on the screen.
Configuration
Agility Configuration
Agility configuration file
<GeneralWebService
enabled="true"
.
.
.
/>
WARNING increase version in configuration embedded to Agility for Android will override customized remote sites configurations if they have smaller version. Also the statuses described below shouldn't be touched.
 <Settings version="5" name="default">
 <WaitForSyncDelay>30</WaitForSyncDelay>
 <IsDecideLaterEnabled>true</IsDecideLaterEnabled>
 <AutoAccept>false</AutoAccept>
 <AutoDepart>false</AutoDepart>
 <AutoLogin>false</AutoLogin>
 <AutoPassword>true</AutoPassword>
 <RemoveLogAfterDays>1</RemoveLogAfterDays>
 <RemoveAllLogAfterDays>5</RemoveAllLogAfterDays>
 <TimeFormat>Days</TimeFormat>
 <AlarmSecond>false</AlarmSecond>
 <VisibleClocksListView>true</VisibleClocksListView>
 <VisibleClockJobDetail>false</VisibleClockJobDetail>
 <AutoSoundNewJobType>true</AutoSoundNewJobType>
 <CompletionComments>
   <Comment>Completed</Comment>
   <Comment>Customer cancelled</Comment>
   <Comment>Requires follow-on</Comment>
 </CompletionComments>
 <JobStatusList>
   <JobStatus>
     NewJob
     <Description>Scheduled</Description>
     <IsSuspendingCurrent>false</IsSuspendingCurrent>
     <IconCode>Schedule</IconCode>
     <FollowOnCodes>AcceptedJob,RejectedJob</FollowOnCodes>
   </JobStatus>
   <JobStatus>
     ReceivedAndStored
     <Description>Received & Stored</Description>
     <IsSuspendingCurrent>false</IsSuspendingCurrent>
     <IconCode>ReceivedAndStored</IconCode>
     <FollowOnCodes>AcceptedJob,RejectedJob</FollowOnCodes>
   </JobStatus>
   <JobStatus>
     AcceptedJob
     <Description>Accepted</Description>
     <IsSuspendingCurrent>false</IsSuspendingCurrent>
     <IconCode>AcceptedJob</IconCode>
     <FollowOnCodes>DepartingForJob,JobSuspend,RejectedJob</FollowOnCodes>
   </JobStatus>
   <JobStatus>
     DepartingForJob
     <Description>Departed</Description>
     <IconCode>DepartingForJob</IconCode>
     <FollowOnCodes>ArrivedOnSite,JobSuspend</FollowOnCodes>
   </JobStatus>
   <JobStatus>
     ArrivedOnSite
     <Description>Arrived</Description>
     <IconCode>ArrivedOnSite</IconCode>
     <FollowOnCodes>CompletedJob,JobSuspend</FollowOnCodes>
   </JobStatus>
   <JobStatus>
     CompletedJob
     <Description>Completed</Description>
     <IconCode>CompletedJob</IconCode>
   </JobStatus>
   <JobStatus>
     RejectedJob
     <Description>Rejected</Description>
     <IsSuspendingCurrent>false</IsSuspendingCurrent>
     <IconCode>RejectedJob</IconCode>
   </JobStatus>
   <JobStatus>
     JobSuspend
     <Description>Suspend</Description>
     <IconCode>JobSuspend</IconCode>
     <FollowOnCodes>DepartingForJob,ArrivedOnSite</FollowOnCodes>
   </JobStatus>
   <JobStatus>
     CancelJob
     <Description>Unscheduled</Description>
     <IsSuspendingCurrent>false</IsSuspendingCurrent>
   </JobStatus>
   <JobStatus>
     CANCELLED
     <Description>Unscheduled</Description>
     <IsSuspendingCurrent>false</IsSuspendingCurrent>
   </JobStatus>
 </JobStatusList>
 </Settings>
System parameters controlling Agility for Android
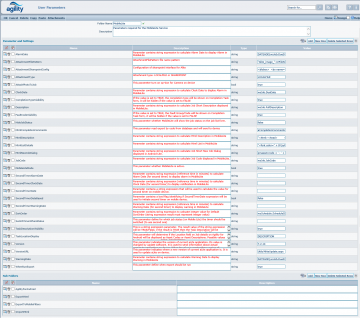
To enable Agility for Android functionality in Agility appropriate system parameter must be set. Go to System Configuration -> System Parameters. Open MobileLite folder and set MobileLiteMode value to true.
Other parameters allow customization of the data presented in Agility for Android. System parameters allow also control of the global updating of the Agility for Android application deployed to Android devices (please refer to Licensing and Software Update documents for details).
System parameters for Agility for Android description:
- WarningDate
This parameter is used to turn the countdown clock into a warning state. The Countdown timer color will turn orange if current time reaches the WarningDate.
- Alarm date
This parameter is used to turn the countdown into an alarm state. The Countdown timer color will turn red if current time reaches the AlarmDate.
- Clock date
This parameter is used to control calculation of the remaining time. Agility for Android displays a value which is calculated from: NOW – ClockDate where NOW denotes the current date and time.
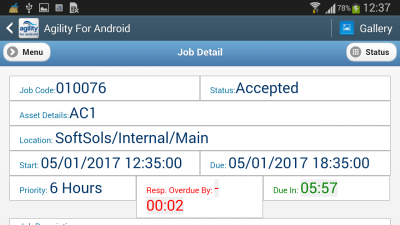
Response and Due Warnings shown in Portrait and Landscape mode below.
- HtmlListDetails
- MobileLiteMode
- SortOrder
- TaskLocationDisplay
- Path: SYSTEMPARAMETERS\MobileLite\
- Name: TaskLocationDisplay
- Type: String
- Description: ‘This parameter will determine if the Location field on Job Task details on Agility for Android will be displayed as Asset Codes or Asset Descriptions. Possible values for this parameter are; CODE & DESCRIPTION.
- Default out of the box value: CODE.
- If the Parameter value is empty or any other value than Code/Description, the default will be to show Codes.
- TaskDescriptionVisibility
- Path: SYSTEMPARAMETERS\MobileLite\
- Name: TaskDescriptionVisibility
- Type: String
- Description: ‘This is a string expression parameter. The result value of the string expression will be TRUE/False, if the result is TRUE then the Task Description will be shown on the Job detail form, it will be hidden if the result is FALSE.’
- Default out of the box value: ‘TRUE’.
- If the Parameter value is empty then this will be same effect as TRUE value.
- FaultCodeVisibility
- Path: SYSTEMPARAMETERS\MobileLite\
- Name: FaultCodeVisibility
- Type: Bool
- Description: ‘If the value is set to TRUE, the Fault Group/Code will be shown on Completion Task form, it will be hidden if the value is set to FALSE.
- Default out of the box value: ‘TRUE’
- If the Parameter value is empty or other than TRUE/FALSE then this will be same effect as TRUE value
- CompletionTypeVisibility
- Path: SYSTEMPARAMETERS\MobileLite\
- Name: CompletionTypeVisibility
- Type: Bool
- Description: ‘If the value is set to TRUE, the completion type will be shown on Completion Task form, it will be hidden if the value is set to FALSE.
- Default out of the box value: ‘TRUE’
- If the Parameter value is empty or other than TRUE/FALSE then this will be same effect as TRUE value
- Additional Parameters
Additional Parameters are documented in the Agility System configuration documentation.
Set up labour for use with Agility for Android
The labour resource using the Agility for Android software on the mobile device must be configured as an Agility for Android user. Additionally, the labour resource must be paired with an agility user profile. Once this is done, the user should be able to login from mobile device (using agility user credentials).
Update Parameters
1. If the export-import definitions need to be updated on the mobile device, “Update Mobile Parameters” button can be used from the relevant Agility Labour Detail record form to force sending updated definitions to the mobile device.
Using Agility for Android
Once Agility for Android has been installed on the device, an icon can be found under the device program menu.
Tapping the icon will launch Agility for Android.
Login screen
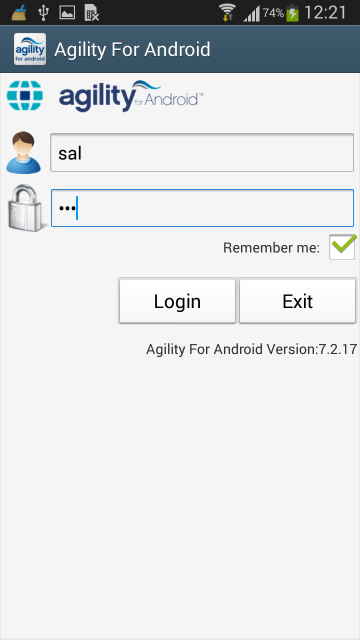
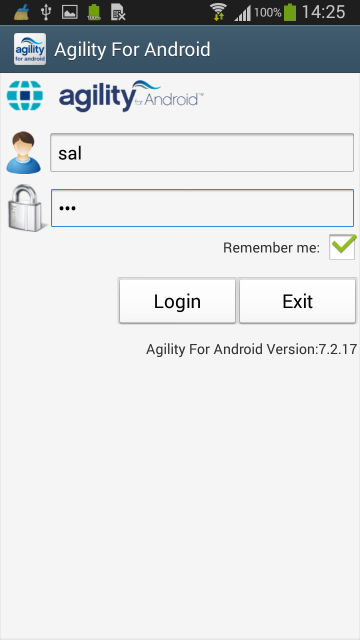
The screen below shows the layout of the Agility for Android login screen. Top text field is provided to enter Agility login name, the text field below should contain user’s password. The “Remember me” option has been provided to allow storing user credentials to be prepopulated when the user logs into the application next time:
Processing the job
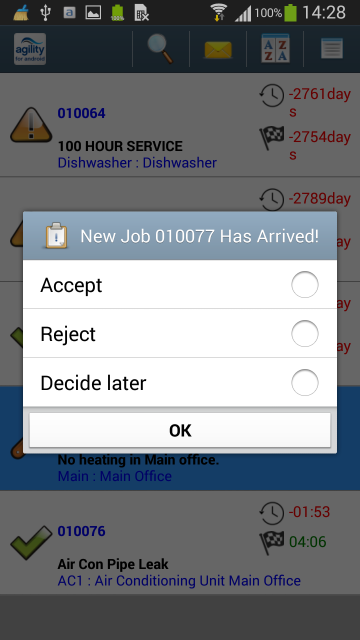
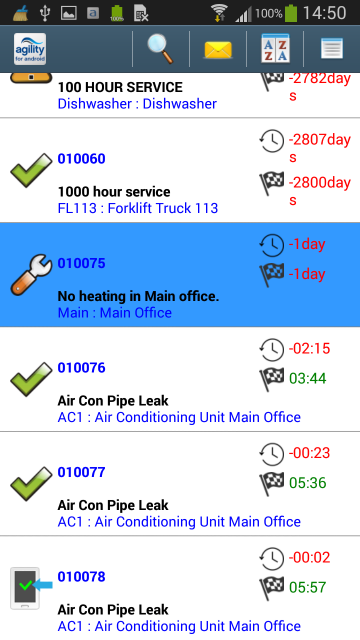
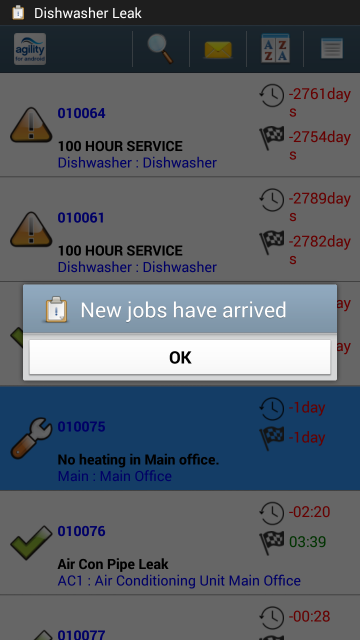
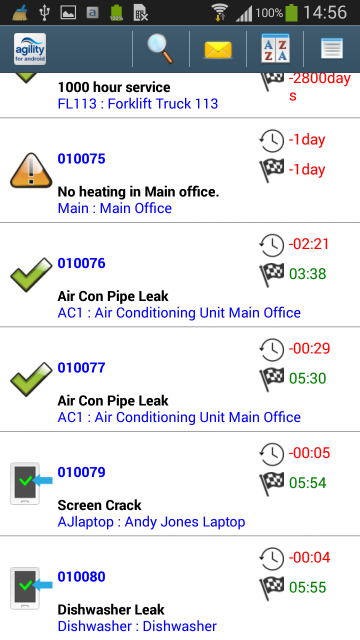
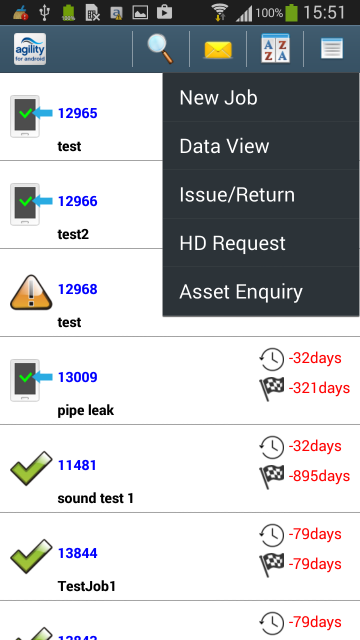
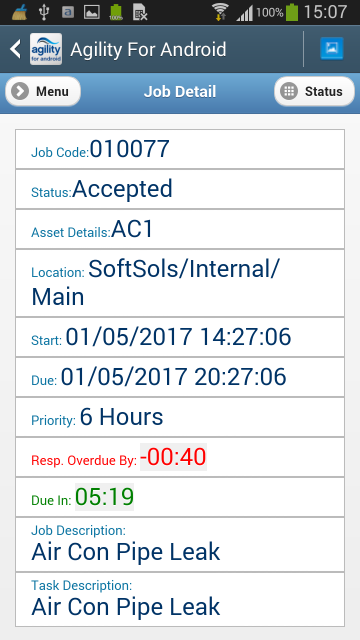
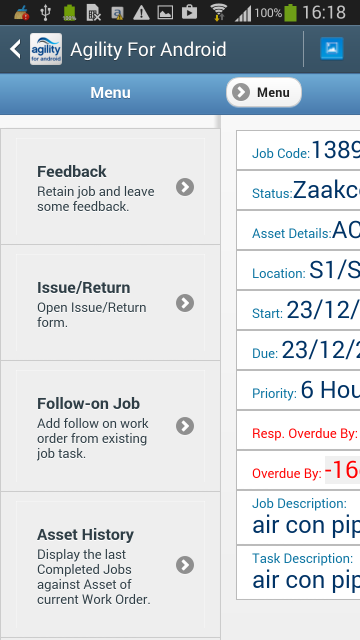
Once the Job Task is received by the Agility For Android application user need to decide if the Job Task will be accepted, rejected or decide later (picture 1) (decide later means that the Job Task will be stored on device in “Received & Stored” status – picture 2). Please note that if more than one Job Task is received by the application then there will be no options presented to choose whether the Job Tasks will be accepted/rejected/decided later (picture 3). In the case of multiple Job Tasks arriving, all Job Tasks will remain in the “Received & Stored” status, so the user can read the Job Task details first then accept or reject it (picture 4).
Jobs List
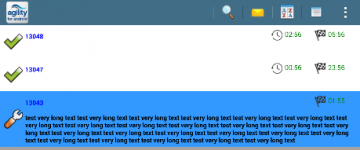
After successful login, the Job Tasks list screen is presented to the user.
The icon on the left hand side of the Job Task description, identifies current job status. It may be one of the following:
 - New job has arrived and it has not been accepted yet
 - Job Task has been accepted by the mobile device user
 - Mobile device user has departed to do the Job Task
 - Mobile device user has arrived on site to do the Job Task
On the right of the icon, there is a job description which includes full job classification and additional information entered when the job was created.
On the top right corner, the figure is displayed representing time remaining until the job becomes overdue.
Tapping the description of the particular job will cause a detail screen for that job to be displayed. The layout and functionality of the details form is described in Job details section.
Form menu is located on the top-right corner of the form. Once the form menu icon is tapped, following options are displayed:
- Search
 – Allows to filter Job Task List
 - Messages
 – directs to Messages forms, where message can be sent to Agility back office system, which are available for review using Labour resources -> Expert Messages form:
- Sort
 – allows to sort Job Tasks list by start date, due date or select default sorting which can be configured by the Agility back office system
 - Menu
 – expands window with more options and functions
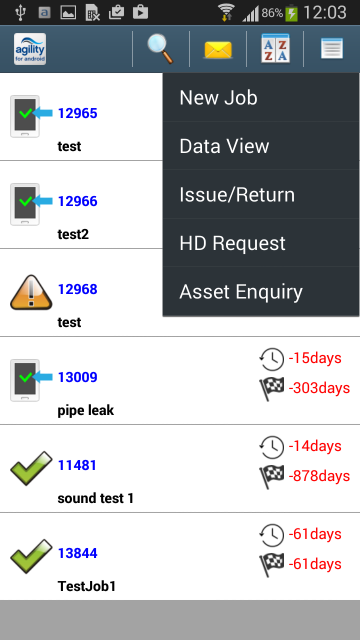
 - New Job – directs the system to the “New Job” form, which has been provided to support raising new job requests. The form is described in the next paragraph.
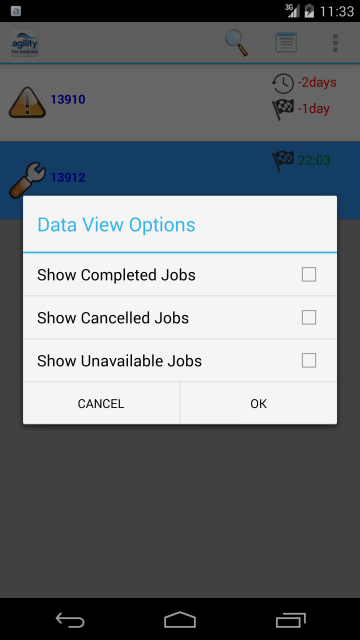
- Data view – allows to set visibility for completed and cancelled Job Tasks.
- Issue/Return – directs the system to the “Issue/Return” form, which has been provided to support Stock Issues and Returns.
- HD Request – directs the system to the “Help Desk Request” form, which has been provided to support raising help desk requests.
- Asset Enquiry – allows the user to View data on the Mobile device for a selected Asset.
Job details
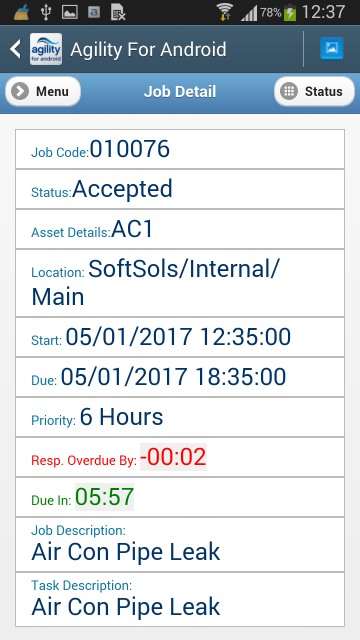
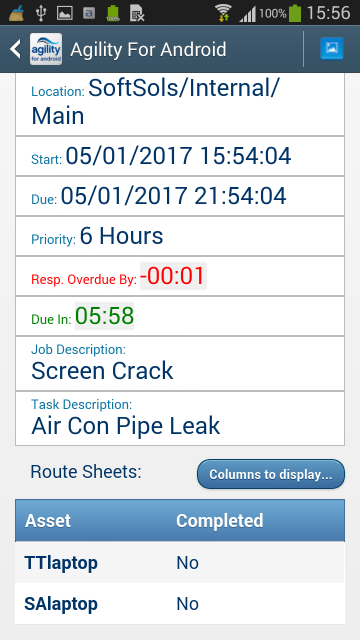
This form is displayed when particular job is tapped on the job list screen.
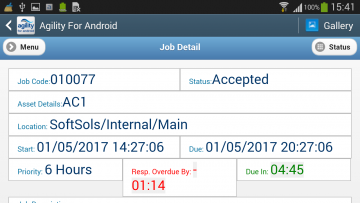
The screen is divided in to sections, where related information is displayed:
- Code – Job Code
- Due In/Overdue by – depending on the condition of the job being overdue or not, it displays the time remaining until the job becomes overdue or the time by which the job is already overdue.
- Status – current status of the job
- Location – placed below status information it summarises information about Location, Room Number etc., and the Asset against which the job has been raised.
- Section with key date information (Start/Latest Start/Due)
- Priority information
- Additional comments about the job
- Specific information regarding the task within the job
- Contact details of the person responsible for the job
Swipe Menu
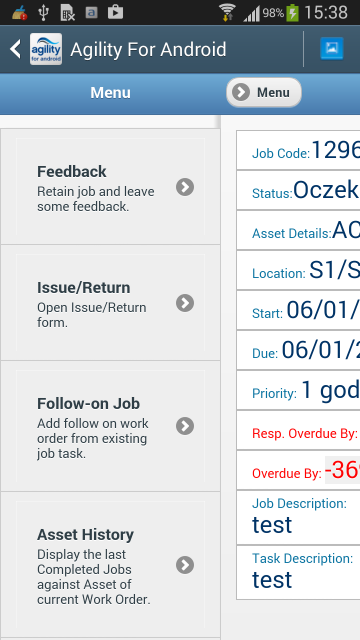
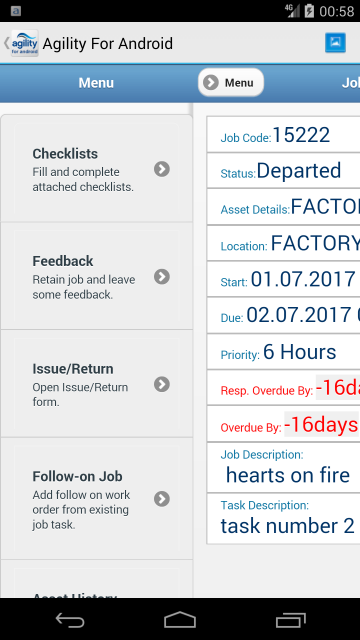
Additional functionalities can be accessed by swiping from left to right on Job Detail screen or by tapping the menu button on top left corner.
Aditional functioanalities are:
- Checklists - Opens the “Checklist” form, allows to add checklist results for Main Asset. Displayed only if any checklist is attached.
- Feedback - Opens the “Feedback” form, allows to add comments and faults.
- Issue/Return - Opens the “Issue/Return” form.
- Follow-on Job - Opens the “Follow-on Job” form.
- Close - Close the Menu, also can be done by swiping from right to left.
- Asset History – Displays the XX number of completed jobs (ordered by completion date) for the Asset against the selected job.
Job Detail Corresponding system parameters:
- Task Location Display - This parameter will determine if the Location field on Job details on Agility for Android will be displayed as Asset Codes or Asset Descriptions. Possible values for this parameter are: CODE, DESCRIPTION
- Task Description Visibility - This is a string expression parameter. The result value of the string expression will be TRUE/False, if the result is TRUE then the Task Description will be shown on the Job detail form, it will be hidden if the result is FALSE.
Job Status
Job Status updates
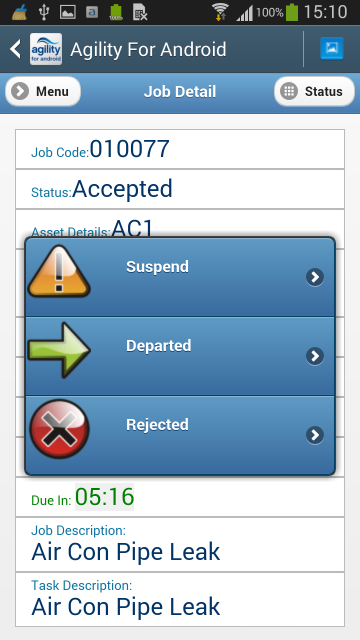
Job status updates are performed on the details screen and are accessible using device’s menu button. After the button is pressed, the option to move the job to the next status will be displayed:
Only statuses, which are available to be accessed from the current status will be shown in the menu options displayed. In the example above, the job Task is currently Accepted, so there are 4 statuses available – Arrived,Departed, Suspended, and Rejected
The last status in the flow is the Completed status, which causes the Job completion form to be displayed. Details of the form completion are described in the Job Completion section.
Unscheduling Job at any status
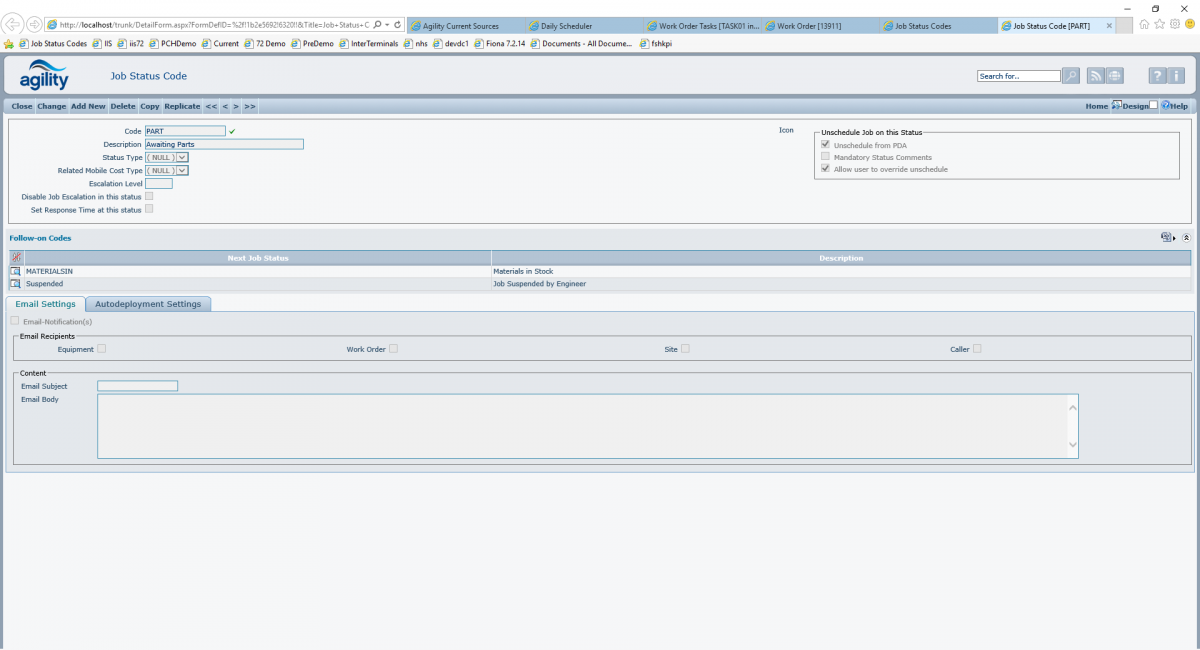
Statuses can be configured to unshedule the job from PDA. It is configurable in Standing Data -> Work Orders -> Work Orders Status Codes.
'Unschedule Job on This Status' groupbox is only visible for statuses other than: Accepted,Arrived,Departed,Scheduled and Unscheduled.
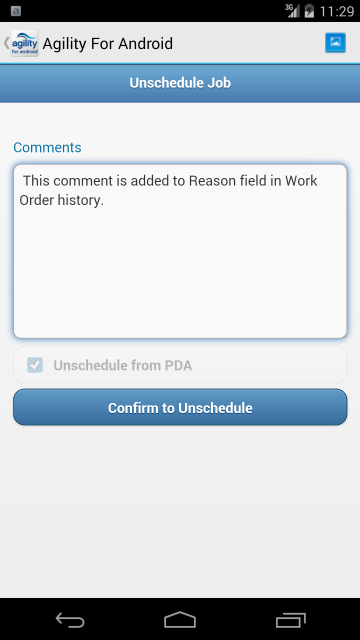
- Unschedule From PDA - when this checkbox is ticked, PDA User will be presented with form shown below before changing the job status.
- Mandatory Status Comment - when this checkbox is ticked, Comment would be mandatory (changing job status without putting them would not be possible). Comment would be stored in Work Order Log.
- Allow user to override unschedule - when this checkbox is ticked, PDA User would have an option to unshedule the job or keep it, otherwise job will be unsheduled automatically.
Example scenario, changing job status to Suspended with only 'Unschedule Job on This Status' checkbox ticked. On PDA 'Unshedule From PDA' checkbox is ticked and disabled, cant be changed by user. When 'Confirm to Unshedule' is clicked, form will close( back to list), job on PDA will change status to Unsheduled, but status on Agility will be set to one chosen by user.
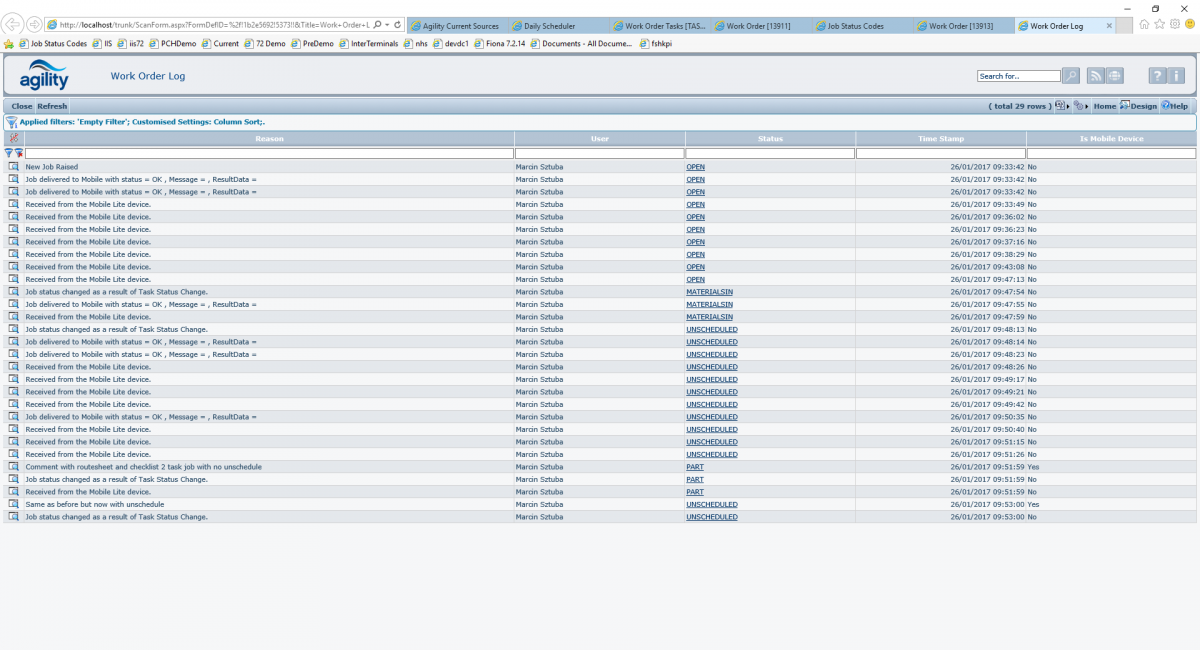
Work Order Log
Comment are added to Reason field in Work Order History and Is Mobile flag is set to true.
If system parameter AppendStatusCommentsToCompletionComments is set to TRUE then comments are also added to Work Order and Task completion comments, similar to Feedback functionality.
Data View
Unscheduled jobs can be displayed on PDA by setting up 'Show Unavailable Jobs' in DATAVIEW.
Create/Attach Photo - Gallery
Gallery
All functionalities related to photos are accessible through the gallery.
If the user wants to see the gallery for current job, the “Gallery” icon can be tapped on the job detail form.
![]()
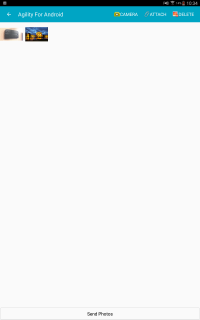
Gallery has four functions : take a photo, attach a photo, delete photos and send photos.
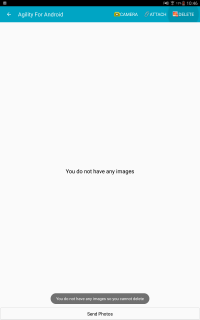
If there are no images, an information message is displayed. Deleting and sending photos is possible only if there are images in gallery.
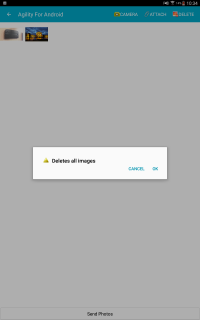
Before deleting all photos, a confirmation dialog is displayed.
Create Photo
If the user wishes to create a photo in the context of the current job, the “Camera” icon can be used on the top of gallery screen:
Next step is take photo by camera. If you want save your image, you should click button “Save”, if not - click “Discard” button.
If any photos are saved against the job, additional information icon is displayed on the job list form.
Attach Photo
1. If you want attach photo for current job you should click icon “Attach” on form.
2. When the icon “Attach photo” is selected, the user is shown a window where they can select the photo.
If the user wants to attach a photo this is done by clicking on the appropriate photo.
3. If a photo is attached, confirmation information is displayed.
Send Photo
Photos can be sent to back office by clicking 'Send Photos' button.
Photos that have already been sent are removed from the Agility for Android Record on the device.
Once the job is completed, all photos attached and not yet sent with the job will be transferred to the back office system and linked as Work Order attachments.
Checklist form
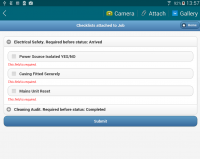
- Checklist are available at any time, they can be updated and amended as long as Task is not completed.
- Changing anything on checklist and confirming will save values on device. Status change will update job on Agility (If the checklist is validated correctly).
- Checklist for main Asset will appear when:
- Completion is required before the task reaches a certain status.
- The Checklist is marked as “MustComplete” in Agility.
- Checklist for Route Sheet will appear always before completing Route Sheet elements.
- It is possible to change status of the task without completing the checklist if that checklist is not marked as ‘MustComplete’ in Agility.
- Completing a job with assigned and incomplete checklists will not complete them (checklists).
- There can be many different checklist assigned to one status within the task completion workflow.
- Checklists are available at any time, they can be modified as long as Task/ Route Sheet is not completed
- If the user attempts completion of the Route Sheet item before completing a Checklist that is marked as ‘Must Complete’ in Agility, then the Checklist form for the route sheet item will automatically appear on screen.
- It is possible to complete a Route Sheet item without filling a checklist if that checklist is not marked as ‘Must Complete’ in Agility.
- Multiple Checklists can be assigned to same set of route Sheet Items.
- Updating a checklist from the back office system will result in a job update on Agility for Android.
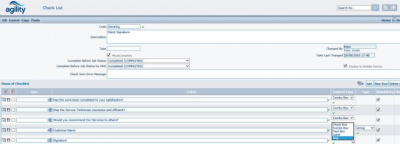
Checklist definition screen
- MustComplete - Declares if checklist has to be completed.
- Complete before Job Status for PDA – identifies the Status which the checklist must be completed before the Workflow is set to that given status (Only for the main asset)
- Deploy to Mobile Device - This flag has to be checked to send checklist to mobile device.
- Items of Checklist - Checklist definition.
Job Completion
A separate form has been provided to gather all the information required during the job completion process. Related information has been grouped into sections so that the screen design is clear for the user. Each section is separately explained below.
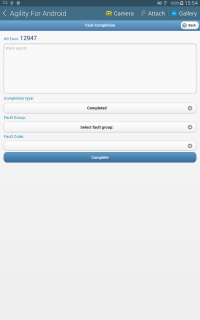
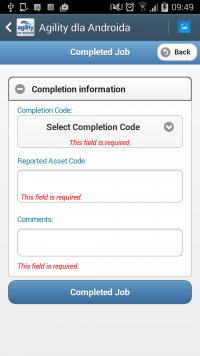
The job completion screen appears on the device once the status Completed is selected on the detail form.
Once this option is selected, a screen similar to that below will be shown:
- Completion code: drop-down allowing to select appropriate completion code (fault code) for the job
- Additional information: depending on the job type and other factors, various additional attributes will be presented to be populated together with the job completion. The rules of the attributes set displayed are exactly the same as the rules used in the standard Agility job completion screen.
Once all information feedback is completed, the “Complete” button may be used to finalize the completion process.
New Job
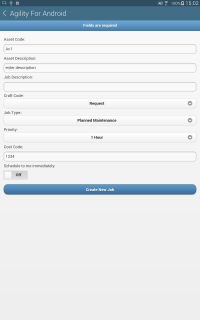
A new job request can be raised using “New Job” menu entry as described in the point above. The form layout is as shown on the screenshot below:
- Asset Code: Write code asset which exist on system otherwise system use default asset.
- Asset Description: Write some words about asset.
- Job Description: Write some words which can understand about define new job.
- Craft Code: Select who should to do this job
- Job Type: Define what it is a job
- Priority: Select the priority for that job
- Department: Select the department from combo box
- Cost Code: Please write the cost code which system should calculate all cost for this work order
- Schedule to me immediately: This job will automatically to current user but only when user is On-line
Once Submit Request button is tapped, new job request is created. Using Back button on the device, the form will be closed and the system will revert back to Job List form.
Follow-on Job
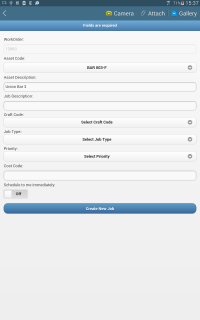
The follow-on form allows the user to raise a follow-on work order from the current job being worked on. The follow-on work order form will be initiated from within the current work order detail form and will be based on the existing ‘New Job’ form. The follow-on work order can be opened from the main job details on ‘Agility for Android’ and can be added against the main Asset/Equipment of the current Task or against any of the route sheet items attached to the current job.
Note: This new functionality requires reinstallation of alite.apk or updating mobile parameters from Labour- >PDA tab.
Clicking on the ‘Follow-on Job’ button will open a new form for adding a new work order on Agility. The new added work order will be linked to the original job created from.
- The original JobCode will be auto populated on the new follow-on form. This will be displayed as a read-only value and cannot be modified.
- The Asset code will be a drop-down list of the main Asset of Original work order and the Asset Codes of all route sheet items.
- The Asset Description field will be auto populated with the description of the selected Asset from the drop-down list.
- The generated follow-on job on Agility will be linked to the original job via the woJob.FollowOnID field.
All other fields will behave the same way as the ‘Add New Job’ form from the main menu on ‘Agility for Android’
Issue/Return form
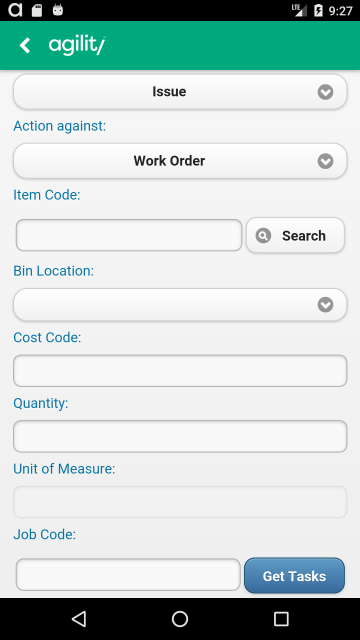
The Issue/return form fields description:
- Stock - allow to select the Inventory Item code.
- Select Action:
- Issue – allow to take items from stock
- Return – allow to return items back to stock
- Action Against – determine with fields have to be entered:
- Work Order – Job Code and Job Task Code
- Equipment – Equipment and Job Type
- Cost Code – Cost Code.
- Item Code – Code of an item e.g. Fuse75Amp
- Search button - Opens Inventory Items list.
- Bin Location – List of available bins or message that there is no available bin.
- Quantity – number of taken/returned items. Has to be greater than 0.
- Job Code - Code of Work Order.
- Get Tasks - Button to get available tasks from Work Order
- Job Task Code – List of available tasks.
- Equipment – Code of Asset.
- Job Type – List of job types.
- Cost code – budget code the goods are issued against.
Item List Page:
The main purpose of the Inventory Item List is to allow the user to search and pick inventory items for Issue/Return. Inventory Item List is accessible from Issue/Return form.
'Inventory Item’ page displays:
- Store description
- Switch that allows the user to include descriptio field in filter criteria.
- Filter bar
- List of inventory items
Every item on a list displays:
- Code
- Description
- Manufacturers Part Number
- BIN Number
- Quantity Available
- Unit of Measure
List of inventory items is filter based on selected STORE from Issue/Return form. List shows top 100 items displayed in alphabetical order (based on item code). After clicking on an item form closes and item is displayed on Issue/Return form.
Search
Characters entered into search box, search against Item Code and Manufacturers Part Number. Search can be extended to description field if 'Search item description' is set to 'yes'.
Items are filtered based on wildcard behavior. i.e Text entered by user is automatically embedded by '%'. User can use additional '%' in filter, that means any value.
If search return no results, show ‘empty’ list & message ‘No matching search results please search’.
Restrictions
- Issue/Return can be performed only if user is online.
- W/O, Cost Code, Item validation is performed instantly after value is changes, or focus changed.
- All displayed fields are mandatory.
- Required System parameters :
- Inventory\Movement\CostCodesOnInventoryMovements
- Inventory\AllowNegativeStock
- System parameter AllowNegativeStock can be set to true to allow taking an item from stock even if quantity of that item is lesser than 0.
- Issue an item if AllowNegativeStock is set to false and quantity of that item is lesser than 0 is not possible.
- Returning an item is always possible regardless of quantity level.
- Every request have 10 second timeout. After that error msg is displayed and performing issue/return action is not possible.
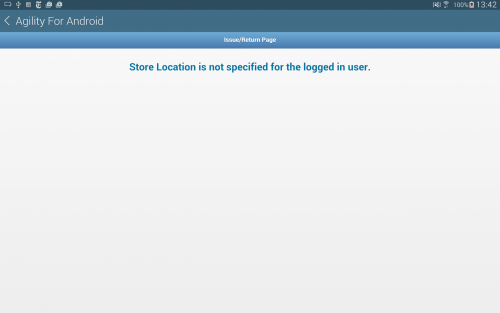
- If the User does not have Store Location set up following message is displayed:
- When user changes the store, item code and bin location is re-validated.
Help Desk Request form
The Enhanced Helpdesk form can be configured to select the type of Helpdesk being raised. It can be configured to be:
- Simple Helpdesk Form: This will allow the helpdesk user to pick an asset and enter free text description of the HelpDesk Request. No Triage Questions will be shown on the form. The free text description will be mandatory in this case.
- Triage Question Based: Where the HelpDesk user is promped with Question & Answers to capture the Request details in a predefined structured way. No free text description is available in this case.
- Triage Question Based with free comments: This option will allow the user to capture the description of the Request using both the structured Question sets as well as the free text description field.
At any point during Helpdesk creation, user can enter gallery and make or attach some photos.This functionality works similar to gallery on Job Detail screen with one exception. It's not possible to send attached photos at any time. Photos are send after submitting the request on summary page.
Form configuration
Heldesk type selection is controlled by the following system parameter: FormDesignConfiguration\EnhancedHelpDeskForm\HelpDeskType
FormDesignConfiguration\EnhancedHelpDeskForm\TriageQuestionsMandatory - When this parameter is set to TRUE, the Comments field will be mandatory on the Enhanced Helpdesk form. If set to FALSE, the field will be optional to fill in. Null value or any other value, the field will be optional.
FormDesignConfiguration\EnhancedHelpDeskForm\HelpDeskCommentsMandatory - When this parameter is set to TRUE, the Triage Question selection will be mandatory for all question levels on the Enhanced Helpdesk form. If set to FALSE, the triage question selection will be optional. Null value or any other value, the triage question selection will be mandatory.
FormDesignConfiguration\EnhancedHelpDeskForm\AssetSelection\SelectFromHierarchy - When this parameter is set to TRUE, the ‘Select from Hierarchy’ Checkbox will be ticked by default when opening the Enhanced Help Desk form. If set to FALSE, NULL, or any other value, the checkbox will be UnTicked by default.
If system parameter ‘ProcessMngt\AccountCodeEnabled’ is set to true, CostCode field is visible and mandatory. Otherwise the field is hidden and not required.
If the system parameters are defined on Agility directly against the USER rather than the 'System User', the value for the user parameter will override the value of the system parameter. This is allowing different users to have different version of form on the same Agility enviroment.
1st page - Asset selection
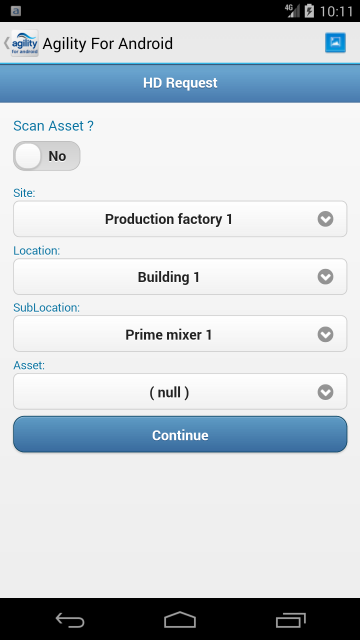
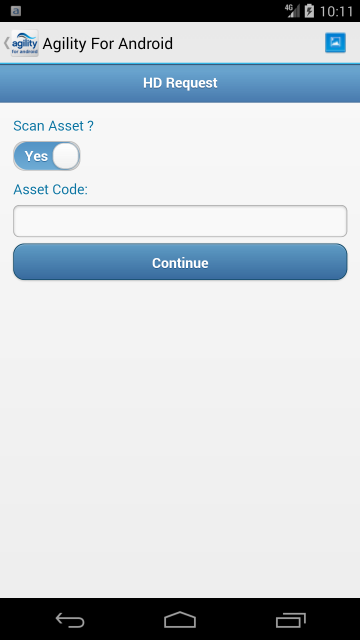
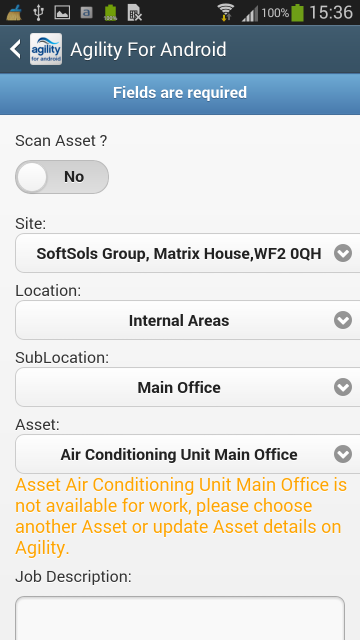
Regardless of Helpdesk type, the first action always is asset selection. Scan Asset button allows the user to switch between picking the asset from hierarchy and entering Asset Code manually (This can be useful if the Asset code is to be entered by scanning a bar code, QR Code or RFID tag).
When selecting asset from hierarchy only site is mandatory. Site is auto populated is user is allowed to only one site. Obsolete items are hidden on every level. The Helpdesk request can be raised against any level within the Asset structure, for example the user can select the SITE only, add description and submit, this will raise the Helpdesk against the selected Site. If the Site & Location are selected, the Helpdesk will be raised against the Location and so on. If Asset is not available for Work Orders appropriate message is displayed underneath Asset field. Creating HD Request for not available asset is not possible.
Error check example: unavailable Asset.
2nd page - Question selection/Comments
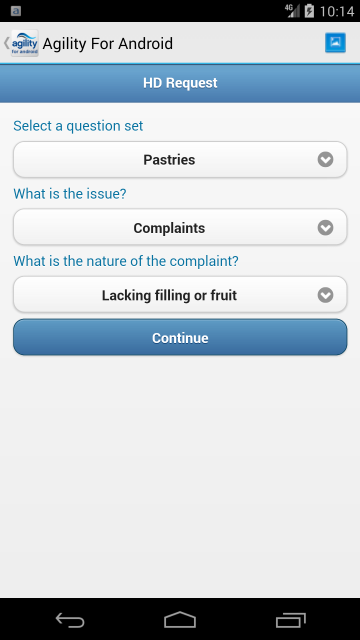
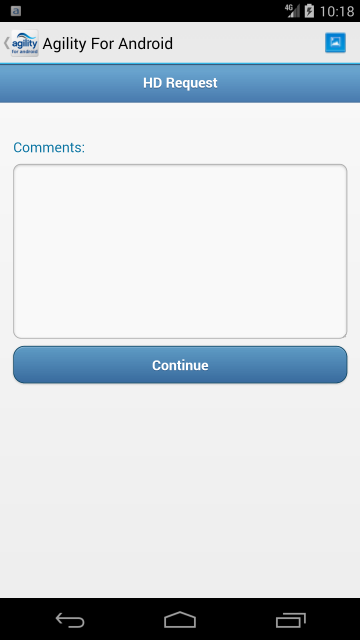
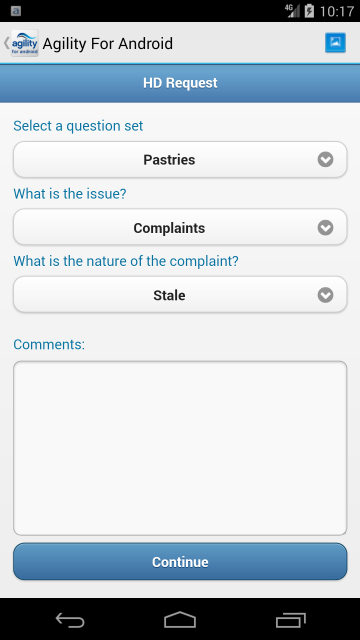
On this page, as mentioned above depending on the helpdesk type, user have an option to:
- Pick Questions & Answers from predefined structure.
- Enter a free text description.
- Pick Questions & Answers from predefined structure and Enter a free text description.
The Triage Question set may be designed so that the last question will prompt the user to input a target planned date to either Start the job or target date to Complete the job. If the Triage Question have the Target Date set to ‘Start by’, then the Dynamic Helpdesk form will display the Start Date underneath the last question selected on the HD form. If the value is ‘Complete by’ then the HD form will show the Due Date field for the user to specify. This field is mandatory. Similar to Triage Question helpdesk form on browser, the standard job is defined by last Question/Answer being selected on the form. If the most recent Question/Answer selected does not link to a standard job, the form should consider the upper level, if not then the upper level and so on.
Standard agility configuration allow to submit triage questions answer only if Triage Questions Set is linked to standard job - warning message is displayed on the form and continue button is hidden. Warning message disappears and continue button shows up when the chosen answer is linked to standard job. It is possible to configure system to allow submitting help desks when question set do not link to standard job. This behaviour is controlled by systemparameter: TriageHelpdeskNoStdJobRequired
Free text description changes height when long text is entered
If the Helpdesk Form is configured so that the Comments field is visible only without Triage Questions, then the Default Value-Out of the box for the HD fields will be determined by the following parameters:
- ProcessMngt\Helpdesk\CraftCode
- ProcessMngt\Helpdesk\JOBTYPE
- ProcessMngt\Helpdesk\PRIORITYCODE
- ProcessMngt\Helpdesk\STATUSCODE
- ProcessMngt\Helpdesk\DURATION
- ProcessMngt\Helpdesk\Priority
After clicking on 'continue' button if the Questions/Answers selected lead to a standard job which has an associated Picklist group then the Picklist Page is displayed, otherwise Summary page will be displayed.
3rd page - Picklists
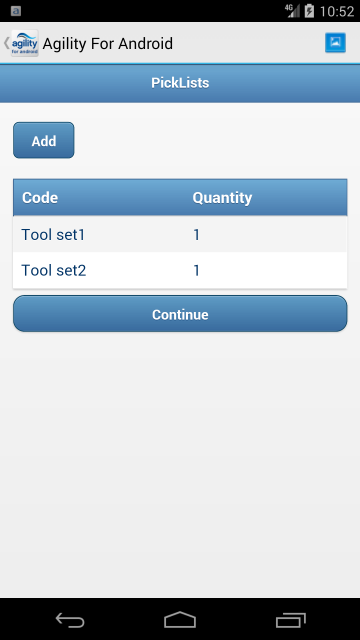
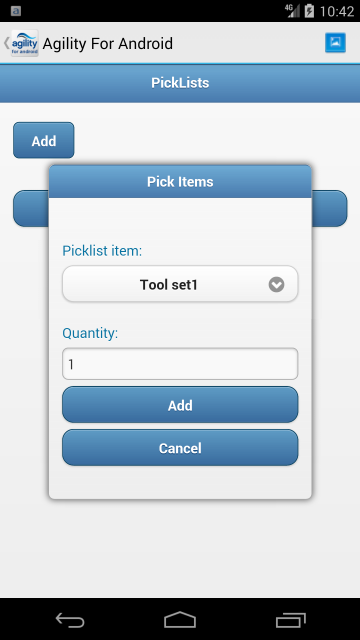
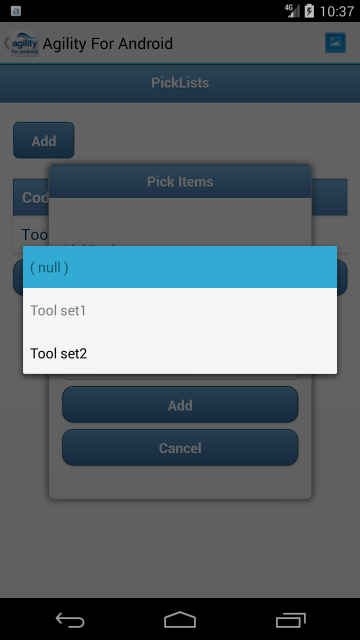
'Add' button displays a popup that allows the user to add picklist items. User can pick an item based on description and can specify the quantity. For quantity, only integers are allowed. Items that are already added to the list are greyed out, that's prevent from adding them twice.
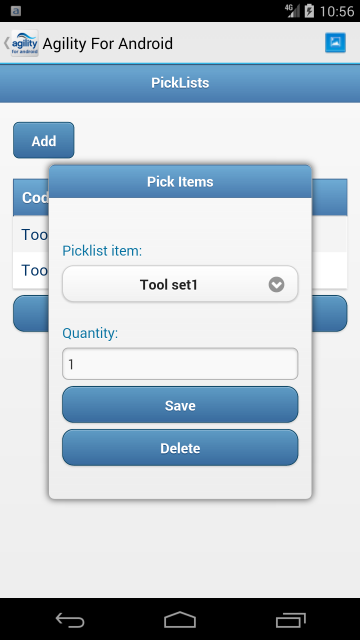
User can click on previously added item to edit or delete it.
After clicking on 'continue' button summary page shows up.
Summary page
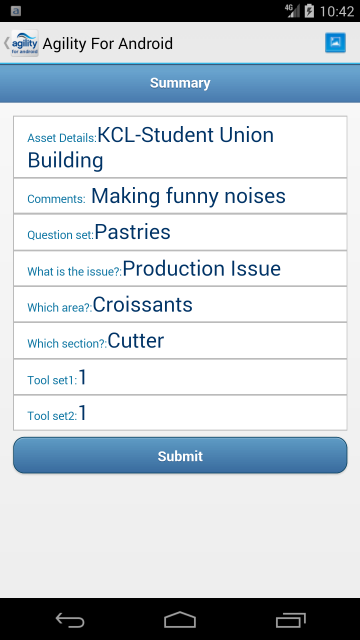
Summary page gathers all information previously chosen by user: Asset details, Triage questions answers, picklist items and comments. User can freely click 'back' button and correct nesesery data.
After clicking 'Submit' request with all attached photos is send to Agility and new WO is created. After that, short message with confirmation message is displayed.
Restrictions
- Help Desk Request can be performed only if user is online.
- Site/Location/Sublocation/Asset validation is performed instantly after value is changes, or focus changed.
- Every request have 10 second timeout. After that time error message is displayed and performing Help Desk Request action is not possible. If there is no connection, request is resend after 30 second.
- User permissions are taken into consideration.
Asset Enquiry
The main purpose of the Asset Enquiry Functionality is to allow the user to View data on the Mobile device for a selected Asset.
Asset Enquiry can be accessed from the Main menu.
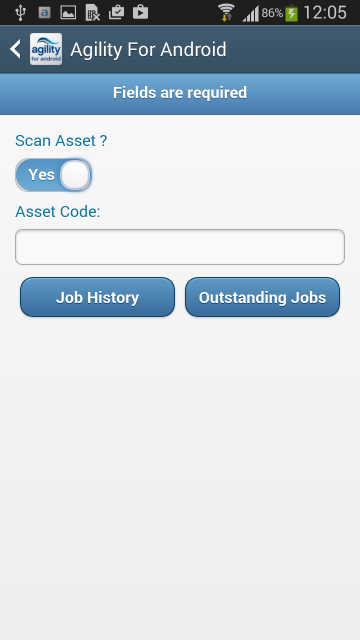
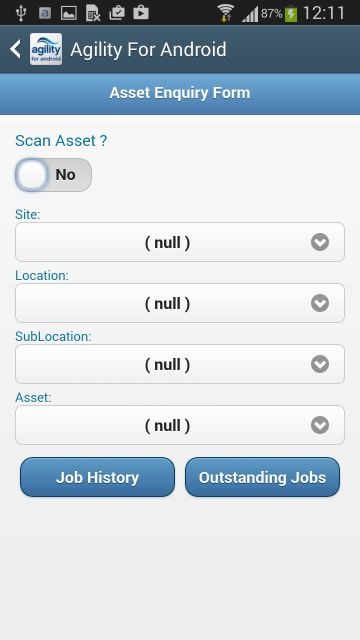
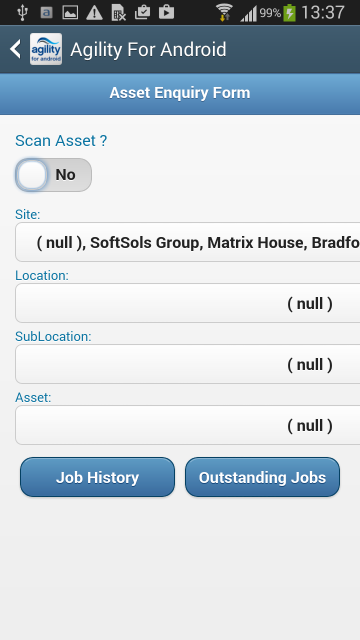
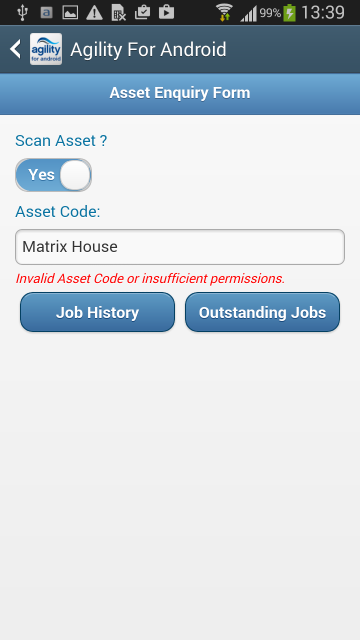
Scan Asset
- If the ‘Scan Asset’ switch is set to ‘Yes’, this then allows the user to lookup the Asset and enter the Asset manually. The Asset ‘code’ and ‘description’ is displayed.
- If the ‘Scan Asset’ switch is set to ‘No’, this then allows the user to pick the Asset from the Equipment structure from table pmAsset. The only mandatory field is site to View any data. If the ‘Scan Asset’ switch is set to ‘Yes’ the Site, location, Sub-location and Assets are not visible.
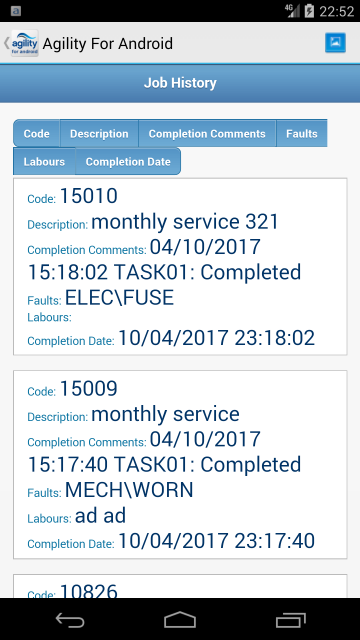
Job History
- Both the ‘job history’ and ‘outstanding jobs’ functionality described below applies to both of the above forms, i.e when the Scan Asset switch is set to ‘Yes’ or ‘No’
- The job history allows the user to View the ‘Completed’ jobs for the selected Asset, ordered by ‘completion date’. This is a simple View asset detail form, and is not an interactive drill down form. In Standard product, the View here shows the last 10 Completed jobs. However, this is configurable. "MobileLite\ShowLastXCompleted"
The Job detail in the Scan view will display the following fields for each job:
- Description
- Completion Comments
- Faults
- Labour
- Completion Date
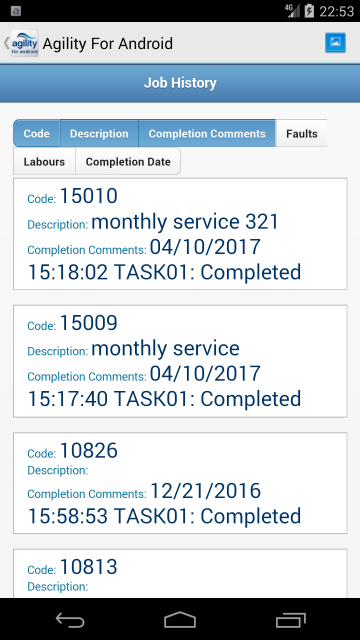
- Within the Job history scan form, the User also has the ability to show/hide the fields listed above. To do this, the User simply taps on the field, the colour will change from ‘Blue’ to ‘Grey’ and will auto hide the field.
- As you can see here, fields faults and labours have been de-selected. To show the fields again, the User has to tap on the fields.
Outstanding Jobs
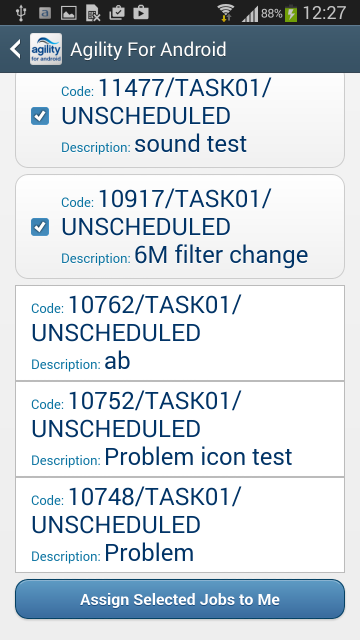
This view will show the User the ‘Outstanding Jobs’ for the selected Asset and those jobs that have not been scheduled to any Labour employee. The fields shown in this view are:
- Job Code
- Job Status
- Job Description
If the logged in Mobile user is part of a ‘Craft’ where the same Craft is attached to the job, then the user can select the job or multiple jobs via the tick box and take ownership of that job by using the Assign selected jobs to me button.
Permissions
- User permissions are also taken into account, for example if a User is restricted to only see a particular Site then this will reflect on the forms.
- The Equipment structure form will simply default to the Site the User is only allowed to see, no other Site can be selected. If the User attempts to locate a Site manually that they do not have permission to see, they will be denied.
Asset History
- Asset history is now available as a Menu item. Within the Job detail screen, the Asset history is displayed for the Asset of the selected Job, this is the same View as the Job history form described above.
Offline/Online mode
If the Mobile User is Offline, then jobs will not communicate to the PDA, although the User can still login and connect.
- Any jobs completed on the Android application will remain open in the back office system.
- Once the Mobile user appears online, the allocated job will be pushed to the device and the job will complete in the back office.
Feedback form
- Feedback form can be accessed at any status.
- Every time the feedback form is populated, it assumes new entries for all fields on the form, Agility update will take place when the OK button is clicked on the feedback form.
- All fields on the feedback form are optional.
- If the Fault Code added on Android already exists against the job on Agility, then no new entry will be added in the woJobFault table.
- Comments - free text field, the entry to this field will be saved to Task completion comments and Job Completion comments. Each new entry will be added to existing Task and job completion comments as follow: relevant time stamp + Labour + comments.
Response Target
- The Response Target counter shows under the Due Date counter with relevant labelling to distinguish which is which.
- The Response Target Time counter should be hidden once the Task has been responded to.
- The Task is responded to when it reaches status specified in the system parameter(\\MobileLite\AgilityForAndroid\HideResponseTimerStatus) "MobileLite\HideResponseTimerStatus"
- If the system parameter (\\MobileLite\AgilityForAndroid\HideResponseTimerStatus) "MobileLite\HideResponseTimerStatus" is BLANK, the Responded To status will be ‘ArrivedOnSite’. Note: This status in Agility has to have the 'SetRespondedAt' flag set to true.
- Job Task list can be sorted by Response Date.
- If the system parameter (\\MobileLite\AgilityForAndroid\SecondTimerClockDate) "MobileLite\SecondTimerClockDate" is BLANK, Second timer will be hidden on both list and details.
- If the system parameter (\\MobileLite\AgilityForAndroid\SecondTimerClockDate) "MobileLite\SecondTimerClockDate" is NOT BLANK,(\\ProcessMngt\Job\UseAutoResponseTime) have to be set to TRUE.
- In other functionalities Second timer is working in same way as Due Date Timer.
Route Sheets
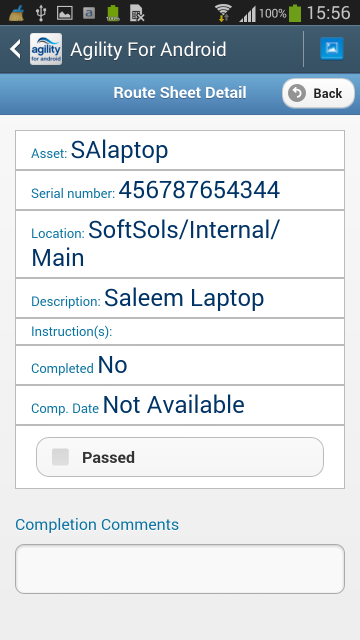
Columns displayed on screen depend on screen resolution. The wider the screen the more columns are displayed with maximum of five. Every table row is clickable. Clicking on a route sheet opens detail screen.
Completing a route sheet is only possible when the job status is set to “Arrived”, in every other job status the button is hidden. Even though changes on the route sheet detail form can be made at any time.
A completed route sheet cannot be “uncompleted”. Changes in the Agility system are visible immediately after the “Complete RouteSheet” button is clicked.
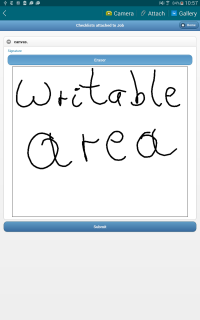
Signatures
- Agility
Checklists items have new Control Type: “Img”. This type will indicate Agility for Android to create field for signature capture. One checklist can have multiple “img” items.
- Agility for Android
Adding field with Control Type “img” will add canvas into Checklist on Agility for Android.
Search
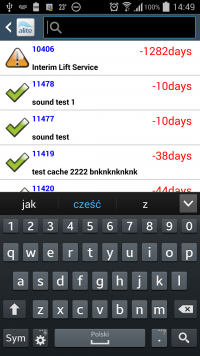
When user touches ![]() then search text box is displayed. In the same time virtual keyboard is opened to allow start search. See picture below
then search text box is displayed. In the same time virtual keyboard is opened to allow start search. See picture below
Now after each change of entered text, also by removing any character, system start dynamic search. Results are displayed in the same list. When user uses “space” character on begin or end of string it will be ignored. But if this character will be between other characters then it will be also used by search function. Search function looking for entered text in all strings which are available in this part of list which is displayed basing on Agility System Parameter: “MobileLite\HtmlListDetails”. "MobileLite\HtmlListDetails"
User also can delete all entered text by touching “X” button on end off search text box. When some of listed results are under virtual keyboard user could close it using back button on device. If in this moment user second time uses this button then search function is switched off and all Job Tasks in list are displayed. To leave search function user can touch menu button on device or return to previous screen icon.
Export versioning
There are two variables in exports responses for versioning:
<variable>
<name>minVersion</name>
<value>"7.2.9"</value>
</variable>
<variable>
<name>maxVersion</name>
<value>"7.2.9"</value>
</variable>
minVersion – Set by developer after critical changes
maxVersion – Updated automatically during release process
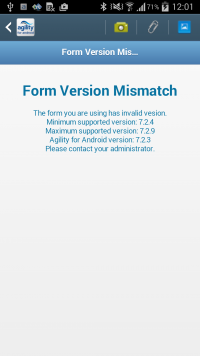
On page initiation, version from android manifest is compared to minVersion and maxVersion. If condition minVersion <= android:versionName >= maxVersion is false, warning page is displayed:
Log Off
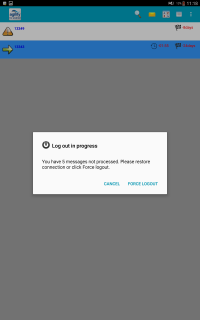
Logging out without a connection (or if the data that have to be synchronized with back office is big) may result in information dialog to show.
'Not processed messages' can be :
- Job status updates
- Checklist updates
- feedback updates
- Photos
- New job requests
- Help desk requests
- Stock Issues and Returns
When all messages will be processed user will be logged off automatically. 'Cancel' can be used to prevent logging off. 'Force Logout' can be used to log off now but data synchronization between application and back office will be prevented and may be lost.
Customer specific functionalities
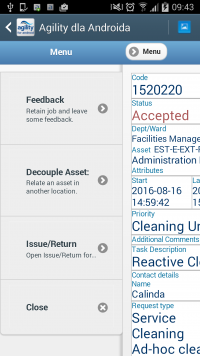
FS - Asset linking ( Decouple asset )
The asset linking functionality for work orders allows to change main asset without updating work order location.
Functionality is accessible from swipe menu:
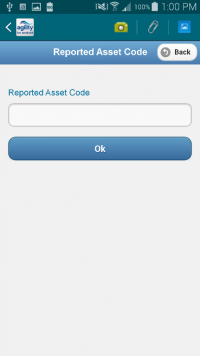
The asset code should be added via an integrated keyboard barcode scanner or entered manually. After pressing the 'OK' button,'Reported Asset' is send to Agility. If Reported asset exists in Asset register, main asset on work order is updated but location stays the same. The user cannot update the location of the work order on the PDA.
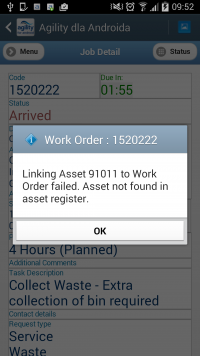
If Reported asset does not exists in Agility a popup message will appear on the PDA indicating that there was no match for the asset. 'Reported Asset' field is updated in Agility however, and notification to Asset Manager is send.
The PDA user may update the Reported Asset field multiple times for the same work order.
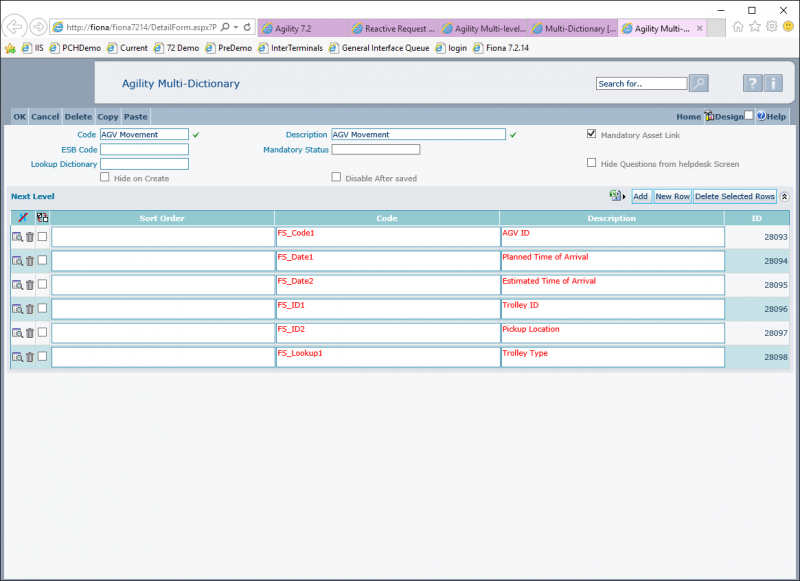
On MultiDictionary->FS_RequestTypes, checking 'Mandatory Asset Link' on dictionary line will make asset linking mandatory on WO completion:
Entering a correct asset will add a label with asset description if performing online.
Form can be accessed offline, information's are send when PDA regains connection, but popup message with linking fail will not be displayed.